On this page
- What Is a Kitchen Display System and Why Restaurants Are Ditching Paper Tickets
- KDS vs. Printed Tickets vs. Tablet-Only Setups
- Hardware and Software You’ll Need Before You Start
- Choosing the Right Screen
- The Brain: Mini PC vs. Android/Fire Tablet
- Network and Redundancy
- Connecting Your WooCommerce Store to a KDS
- Option 1: Built-In Order Screen with FoodMaster
- Option 2: Dedicated WooCommerce KDS Plugins
- Option 3: Webhook-Based Integration with Third-Party KDS Apps
- Option 4: Custom REST API Build
- Step-by-Step Setup: Configuring Order Routing, Stations, and Ticket Rules
- 1. Install and Configure the Plugin
- 2. Map Product Categories to Kitchen Stations
- 3. Set Ticket Timers and Color-Coded Alerts
- 4. Handle Dine-In, Delivery, and Pickup Differently
- 5. Configure Auto-Bump Rules
- Optimizing Kitchen Workflow: Prep Times, Course Firing, and Rush Hour Handling
- Set Realistic Prep Times Per Item
- Use Course Firing for Multi-Item Orders
- Managing Order Throttling During Rushes
- Sync KDS Status with Driver Dispatch and Customer Updates
Paper tickets have been the backbone of restaurant kitchens for decades, but they’re quietly costing you money. Smudged printouts, tickets that fall behind the line, receipts that curl up next to a hot grill — every one of those small failures adds seconds (or minutes) to your ticket times. If you’re running a restaurant on WooCommerce and still relying on thermal printers alone, upgrading to a Kitchen Display System is one of the highest-leverage changes you can make this year.
This guide walks through exactly how to plan, buy, install, and optimize a KDS for a WooCommerce-powered restaurant — whether you’re a single-location pizzeria or a multi-station ghost kitchen. I’ll cover the hardware, the plugin options, the station mapping logic, and the workflow habits that separate restaurants that use a KDS from restaurants that actually benefit from one.
What Is a Kitchen Display System and Why Restaurants Are Ditching Paper Tickets
A Kitchen Display System is a screen (or set of screens) mounted in your kitchen that shows incoming orders in real time, replacing or supplementing the printed ticket rail. Orders appear as digital tickets, cooks bump them when complete, and the system tracks how long each order has been open. Modern KDS setups also route items to specific stations, color-code urgency, and sync with front-of-house so servers, drivers, and customers all see accurate status updates.
The difference between paper and a KDS becomes obvious during a Friday-night rush. Paper tickets pile up, orders get pulled out of sequence, and there’s no way to know if ticket #47 has been sitting for six minutes or sixteen. A KDS shows every open ticket, sorted by age, with a timer that turns yellow at four minutes and red at eight. Nobody has to guess.
KDS vs. Printed Tickets vs. Tablet-Only Setups
- Printed tickets: Cheap, familiar, and works offline. But no timing, no routing logic, and paper jams during rushes are brutal. Ink and paper costs run $40–$80/month for a busy kitchen.
- Tablet-only (one iPad in the kitchen): A step up. You can see orders digitally, but a single tablet becomes a bottleneck — cooks crowd around it, touchscreens get greasy, and there’s no station routing.
- Full KDS: Dedicated screens per station (grill, fryer, expo), automatic routing, timers, and bump-bar or touchscreen controls. Higher upfront cost, but dramatically better throughput.
Restaurants that switch from paper to a properly configured KDS typically report shorter average ticket times and fewer missed items, though the exact gains depend on volume, menu complexity, and how well staff are trained on the new system.
Hardware and Software You’ll Need Before You Start
Before you install a single plugin, plan the physical setup. A KDS that’s mounted in the wrong spot, or running on underpowered hardware, will frustrate your kitchen team within a week.
Choosing the Right Screen
For most small-to-mid kitchens, a 21.5″ to 24″ screen is the sweet spot — big enough to show 6–8 tickets at a glance without overwhelming a small line. Larger operations with high ticket volume can go to 27″ or dual screens per station.
- Touchscreen vs. non-touch: Touchscreens are convenient but get filthy fast in a kitchen. Many pros prefer a non-touch screen paired with a USB bump bar — cheaper, more durable, and faster for cooks with greasy gloves.
- Mounting: VESA-compatible screens let you use articulating arms so cooks can tilt away glare. Mount at eye level, out of direct steam paths.
- Ingress protection: If the screen sits near a fryer or dish pit, look for IP54-rated commercial displays.
The Brain: Mini PC vs. Android/Fire Tablet
You need something to run the display. Three tiers work well:
- Budget ($200–$400 total): An Amazon Fire HD 10 or a mid-range Android tablet mounted on the screen, or a used mini PC running Chrome in kiosk mode pointed at your KDS URL. Works well for single-station setups.
- Mid-range ($500–$900): Intel N100-based mini PC (Beelink, GMKtec) running Windows or Linux, connected to a commercial monitor. Reliable, fanless options exist that handle kitchen heat.
- Pro-grade ($1,200+): Purpose-built KDS terminals (Elo, HP RP9) with sealed touchscreens, spill resistance, and multi-year commercial warranties.
Network and Redundancy
Your KDS is only as reliable as your Wi-Fi. Hard-wire the KDS terminal via ethernet whenever possible — a $30 powerline adapter is cheaper than one lost dinner rush. Also keep a backup thermal printer connected as a fallback; if the internet drops, most WooCommerce restaurant plugins can auto-print tickets locally while the KDS is offline.
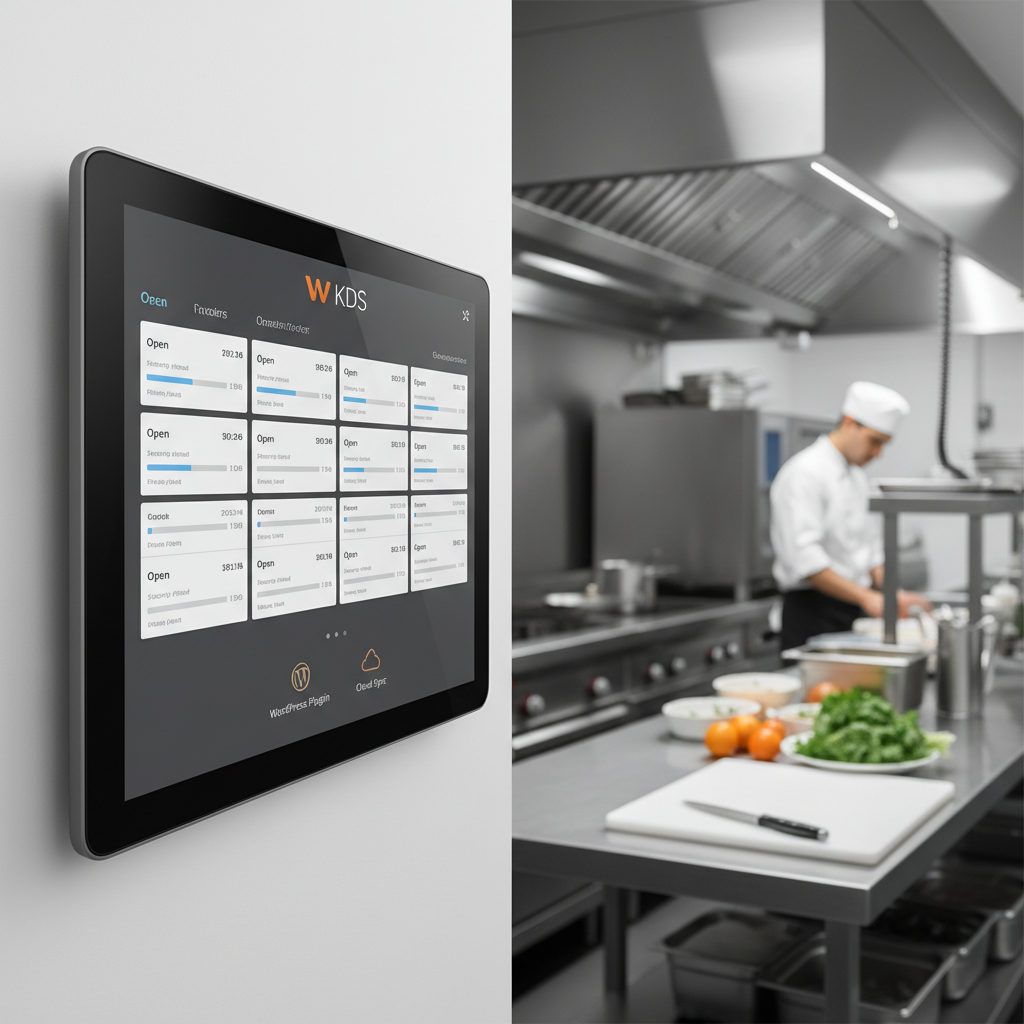
[IMAGE: A commercial kitchen line with a 24-inch KDS screen mounted above the pass, showing color-coded order tickets with timers]
Connecting Your WooCommerce Store to a KDS
Once the hardware is sorted, you need software that gets WooCommerce orders onto that screen quickly and reliably. There are four main paths, and the right choice depends on your budget and how tightly you want everything integrated.
Option 1: Built-In Order Screen with FoodMaster
The simplest route for WooCommerce restaurants is using a plugin that already includes a kitchen order view. Our FoodMaster restaurant ordering plugin ships with a dedicated order management screen designed for kitchens — new orders appear in real time with audio alerts, status buttons, and configurable auto-print rules. Because it’s built directly into WooCommerce, there’s no third-party sync, no API keys to manage, and no monthly SaaS fee per screen.
This is usually the best starting point if you’re already using WooCommerce for online ordering and want a KDS-style workflow without stitching together multiple services.
Option 2: Dedicated WooCommerce KDS Plugins
There are standalone kitchen display plugins on the WordPress plugin repo and CodeCanyon. These typically offer station routing and timer views but vary wildly in quality. Test on a staging site before committing, and check when the plugin was last updated — abandoned plugins are a compliance and security risk.
Option 3: Webhook-Based Integration with Third-Party KDS Apps
Services like Fresh KDS, Square KDS, or Chefmonkey are polished, purpose-built platforms. You’d use a webhook or Zapier-style connector to push new WooCommerce orders into their system. Pros: mature UI, mobile apps, dedicated support. Cons: monthly subscription (typically $20–$50 per screen), and the sync layer becomes another point of failure. Also, most of these are optimized for their own POS ecosystems, so the WooCommerce integration is rarely first-class.
Option 4: Custom REST API Build
For developers or larger operations with unique workflows, WooCommerce’s REST API lets you build a custom KDS front-end that pulls orders, updates statuses, and displays them exactly how you want. Expect 40–120 hours of development time. Worth it only if off-the-shelf options genuinely don’t fit.
For 90% of independent restaurants, options 1 or 2 make the most sense. The added complexity of external KDS platforms only pays off at multi-location scale.
Step-by-Step Setup: Configuring Order Routing, Stations, and Ticket Rules
Here’s the practical workflow I recommend for a WooCommerce Restaurant Plugin: Key Setup Steps”>WooCommerce Restaurant Chains: Location Setup”>WooCommerce restaurant using FoodMaster or a similar plugin. Adapt the specifics to your setup.
1. Install and Configure the Plugin
- Install the ordering plugin on your WordPress site and connect it to WooCommerce.
- Enable the kitchen order screen (in FoodMaster, this is under the order management settings).
- Log into the kitchen screen from your KDS terminal’s browser in full-screen kiosk mode.
- Enable browser notifications and audio alerts so cooks hear new orders even when the screen isn’t in focus.
2. Map Product Categories to Kitchen Stations
This is where a KDS earns its keep. Instead of one screen showing every item, route items to the station that makes them:
- Grill station: burgers, steaks, grilled chicken
- Fryer station: fries, wings, tenders, calamari
- Cold prep: salads, sandwiches, desserts
- Pizza oven: all pizza SKUs
- Bar / beverages: drinks, cocktails
- Expo: a single screen at the pass that shows the full ticket so someone can assemble and quality-check
In WooCommerce, use product categories or custom taxonomies to tag each menu item. Then map those tags to the corresponding station display. If your plugin doesn’t support multi-station routing natively, you can achieve a similar result by filtering the kitchen view by category on each screen.
3. Set Ticket Timers and Color-Coded Alerts
Configure three thresholds per station based on realistic prep times:
- Green (0 to target time): on track
- Yellow (target to +50%): getting warm, prioritize
- Red (beyond +50%): late, escalate
For example, if a burger normally takes 6 minutes, set yellow at 6:00 and red at 9:00. Fried items are usually 3–4 minutes, so shorten accordingly. The point isn’t to shame cooks — it’s to give the expo person an instant visual of where help is needed.
4. Handle Dine-In, Delivery, and Pickup Differently
Not every ticket should be treated the same. A delivery order arriving 20 minutes before the driver shows up needs to be fired at a different time than a dine-in order that needs to hit the table now. Configure your order type tags so:
- Dine-in tickets fire immediately with the highest urgency.
- Pickup tickets show a “customer arrival” time and fire based on prep time working backward from that.
- Delivery tickets factor in driver dispatch time — if you use FoodMaster’s delivery scheduling, this is automatic.
If you’re new to configuring delivery timing in WooCommerce, our guides on restaurant delivery setup walk through the specifics.
5. Configure Auto-Bump Rules
Some KDS setups let stations auto-clear their view once every item is bumped, sending the ticket to the expo screen. This prevents the grill station from staring at a completed ticket while the fryer is still working on fries. Set this up early — it’s a small setting that dramatically cleans up cognitive load.
Optimizing Kitchen Workflow: Prep Times, Course Firing, and Rush Hour Handling
Installing the hardware is the easy part. The real work is tuning your workflow so the KDS actually speeds things up rather than becoming a fancy digital ticket rail.
Set Realistic Prep Times Per Item
Don’t guess. For your top 20 menu items, time three separate cooks preparing each dish during a normal (not rush) shift. Average those times and add 15% for safety. Enter those values in your product settings so the KDS timers and customer-facing ETAs are accurate. Revisit prep times quarterly — menus and staff change.
Use Course Firing for Multi-Item Orders
When a dine-in table orders appetizers, mains, and desserts, you don’t want the mains firing at the same time as the apps. Course firing tells the KDS to hold certain items until the previous course is bumped. Even simple implementations (like tagging courses on the ticket and having the expo person manually fire the next course) beat sending everything at once and letting food die under a heat lamp.
Managing Order Throttling During Rushes
When online orders surge during peak dinner rush, your kitchen has a physical limit. A KDS-integrated ordering plugin should let you set max orders per time slot — for example, no more than 8 delivery orders accepted per 15-minute window. FoodMaster and similar plugins include this feature, and it’s the single most effective way to prevent your kitchen from going into meltdown when a promo goes viral.
[IMAGE: Dashboard view of a WooCommerce restaurant KDS showing order throttling settings and ticket timer configuration]
Sync KDS Status with Driver Dispatch and Customer Updates
When a cook bumps the final item on a ticket, that should automatically:
- Update the WooCommerce order status to “Ready”
- Send an SMS or email to the customer (“Your order is ready for pickup” or “
Commission-free ordering
Run restaurant orders on your own WordPress site
FoodMaster adds delivery, pickup, dine-in, POS, and kitchen tools — with zero per-order fees.