On this page
- What Is a Kitchen Display System and Why WooCommerce Restaurants Need One in 2026
- KDS vs. Thermal Receipt Printer: Which Wins?
- Choosing the Right Hardware and Setup for Your Kitchen
- Option 1: Android Tablet or iPad (Budget: $150–$500)
- Option 2: Fire TV Stick or Mini PC + Monitor (Budget: $300–$700)
- Option 3: Commercial KDS Terminal (Budget: $800–$2,500)
- Network: Wire It If You Can
- Connecting WooCommerce Orders to Your KDS With FoodMaster
- Step 1: Install and Configure FoodMaster
- Step 2: Open the Dashboard on Your KDS Device
- Step 3: Configure Auto-Refresh and Sound Alerts
- Step 4: Set Up Order Statuses
- Step 5: Display Order Details Cooks Actually Need
- Setting Up Order Routing by Station (Pizza, Grill, Drinks, Cold Prep)
- Tag Menu Items With WooCommerce Categories
- Set Up One Dashboard URL Per Station
- Color-Code by Order Type
- Prioritization Rules
- Integrating Printers, POS, and KDS Together
- Recommended Printer Hardware
- Google Cloud Print Is Dead — What Now?
- POS Integration for Unified Reporting
Anyone who has stood in a busy kitchen on a Friday night knows the sound of a printer spitting out ticket after ticket, only to have half of them curl onto the floor or get splashed with sauce. Paper tickets worked fine in 2005. They don’t work when your WooCommerce store is pulling in orders from a website, a QR code menu, phone calls, and third-party marketplaces all at once.
A Kitchen Display System (KDS) fixes that mess. And if you’re running a restaurant on WordPress with WooCommerce, wiring one up is far easier — and cheaper — than most owners think. Here’s exactly how to do it, what hardware to buy, and how to route tickets so your grill cook isn’t drowning while the salad station stands idle.
What Is a Kitchen Display System and Why WooCommerce Restaurants Need One in 2026
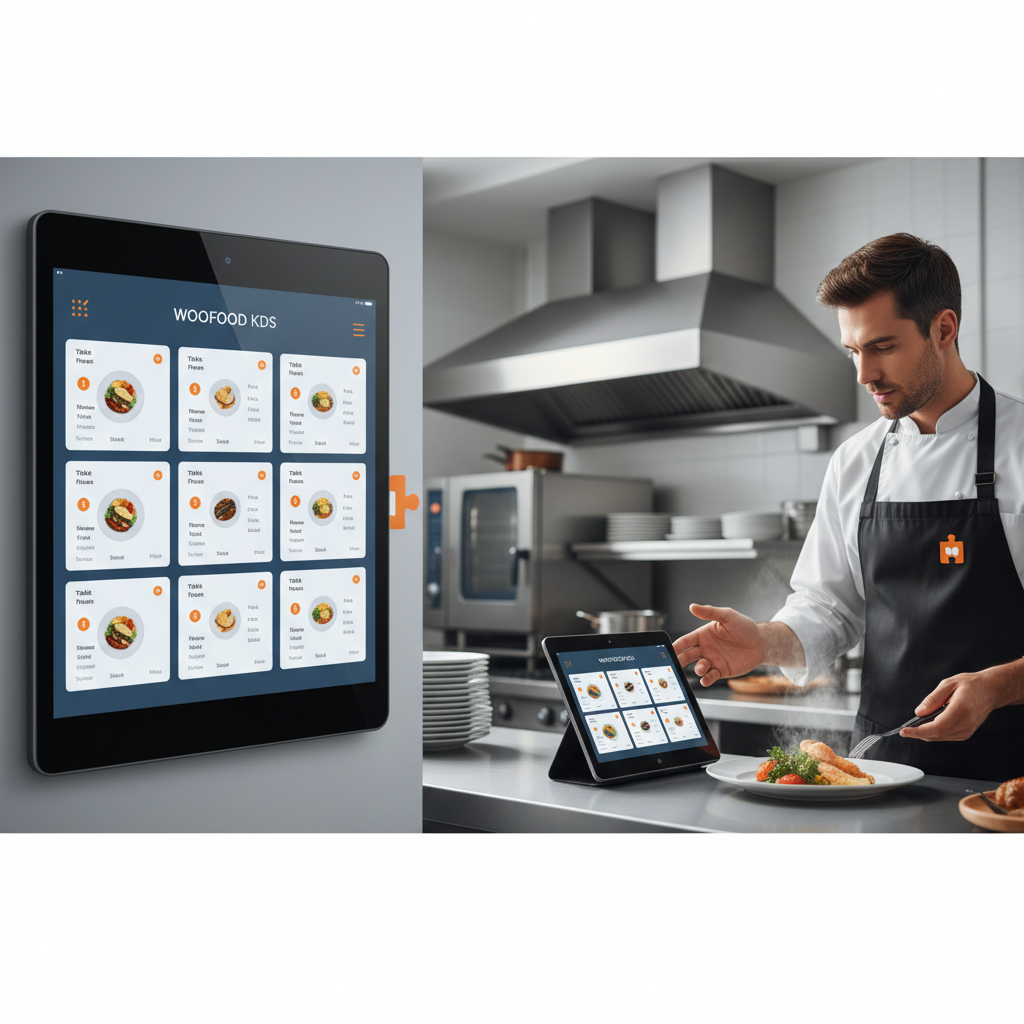
A Kitchen Display System is a screen — usually mounted above a prep station — that shows incoming orders as digital tickets. Instead of a printer chirping and spitting paper, tickets pop up on the display, color-coded by status, and cooks tap or press a bump bar to mark them as prepared, ready, or completed.
The switch from paper to screen sounds like a small change. In practice, it reshapes the entire back-of-house workflow:
- Fewer lost or misread tickets. Digital tickets don’t fall behind the line or get smudged by grease.
- Faster ticket times. Restaurants that migrate from paper to KDS commonly report ticket-time reductions of 15–25%, mostly because cooks can see the entire queue at a glance and batch similar items.
- Real-time communication. When a server marks an order as “urgent” or a customer edits a delivery time, the change appears instantly on the kitchen screen.
- Better analytics. Every bump, delay, and recall is logged. You can finally answer, “How long does a large pepperoni actually take on a Saturday at 8 PM?”
- Less paper waste. A mid-sized pizzeria burns through 15–25 rolls of thermal paper per month. That adds up.
KDS vs. Thermal Receipt Printer: Which Wins?
Thermal printers are still useful — customer receipts, delivery labels, and driver dockets all need paper. But for high-volume prep, a KDS wins on almost every metric:
- Volume handling: A printer prints one ticket at a time. A KDS shows 20+ simultaneously, sorted by priority.
- Modifications: When a customer edits their order, a printer prints a second ticket. A KDS updates the original in place.
- Recalls: Lost a ticket on paper? Reprint and hope. On a KDS, tap “recall” and it reappears.
- Cost over 3 years: A printer + paper + maintenance often exceeds the cost of a $150 Android tablet running a KDS interface.
The sweet spot for most restaurants is a hybrid setup: printer for customer-facing dockets, KDS for kitchen prep. More on that later.
Choosing the Right Hardware and Setup for Your Kitchen
You don’t need a $2,000 commercial KDS terminal to get started. Here are the three most common setups, ranked by budget.
Option 1: Android Tablet or iPad (Budget: $150–$500)
The most popular choice for independent restaurants. A 10″ or 12″ tablet mounted near the prep station runs a browser or app that displays your WooCommerce orders. Look for:
- Screen brightness of at least 400 nits — kitchens are surprisingly bright, and glare kills readability.
- An IP-rated case or at minimum a silicone bumper. Splashes happen.
- Wall or arm mounts — companies like Elevate, Heckler, or generic VESA mounts on Amazon work fine.
Recommended for: pizzerias, cafés, small burger joints, ghost kitchens with 1–2 stations.
Option 2: Fire TV Stick or Mini PC + Monitor (Budget: $300–$700)
A 24″ or 32″ monitor mounted above the line, driven by an Amazon Fire Stick, Chromecast with Google TV, or a small mini PC (Intel NUC or similar). This gives you a much larger viewing area — cooks 8 feet away can still read the tickets.
Pair it with a wireless keyboard or a dedicated USB bump bar for status changes. Best for medium-volume restaurants with 2–3 prep stations.
Option 3: Commercial KDS Terminal (Budget: $800–$2,500)
Rugged, spill-proof, heat-resistant hardware from brands like ELO, Toast, or Aures. Overkill for most independents but essential for high-volume chains and franchises. If you’re running 500+ tickets a day, this is where you belong.
Network: Wire It If You Can
This is the single most-overlooked decision. Wi-Fi in a commercial kitchen is a war zone — microwaves, thick walls, refrigerator compressors, and dozens of other devices all interfere. If at all possible:
- Run Ethernet to your KDS location. A USB-C to Ethernet adapter costs $15 and eliminates 90% of “the screen froze” complaints.
- If wired isn’t possible, use a dedicated 5 GHz Wi-Fi network just for POS and KDS devices. Keep guest Wi-Fi separate.
- Install a UPS battery backup on your router and KDS. Power flickers during a lunch rush have ended more than one restaurant’s Yelp reputation.
[IMAGE: 10-inch Android tablet mounted above a pizza prep station displaying colored order tickets in a busy commercial kitchen]
Connecting WooCommerce Orders to Your KDS With FoodMaster
Here’s where WordPress restaurants get an advantage over closed platforms like Toast or Square: you own your stack, and plugins like FoodMaster’s restaurant ordering system (formerly WooFood) already include a full order management dashboard designed to run on a kitchen screen.
The setup is straightforward. Here’s the workflow most restaurants follow:
Step 1: Install and Configure FoodMaster
Once FoodMaster is installed on your WooCommerce site, navigate to the plugin settings and enable the Order Management dashboard. This is the screen you’ll display on your KDS device.
Step 2: Open the Dashboard on Your KDS Device
On the tablet or monitor in your kitchen, open a browser and log into your WordPress admin. Navigate to the FoodMaster order dashboard (usually under WooCommerce → Orders → Live View). Bookmark it and set it as the browser’s home page so a restart brings it right back.
Step 3: Configure Auto-Refresh and Sound Alerts
In the dashboard settings, enable:
- Auto-refresh (usually every 10–30 seconds) so new orders appear without a manual reload.
- Audio alert — a distinct chime when a new order arrives. Test it during a noisy lunch to make sure it’s audible over hood fans.
- Browser notifications as a backup — a visual pop-up if the sound is missed.
Step 4: Set Up Order Statuses
FoodMaster supports a clean workflow of statuses that map naturally to a kitchen: New → Preparing → Ready → Completed. Each status has its own color, so a glance at the screen tells the head chef exactly where every order stands.
Configure status transitions so that:
- When a cook taps “Preparing,” an SMS or email can optionally fire to the customer.
- When “Ready” is selected, drivers or pickup customers get notified automatically.
- Delivery orders auto-move to “Out for Delivery” when a driver is assigned.
Step 5: Display Order Details Cooks Actually Need
A common mistake is showing everything — customer address, payment method, VAT number — on the kitchen screen. Cooks need food info. Configure your ticket display to prioritize:
- Order number (large, bold)
- Order type (Delivery / Pickup / Dine-in) — color coded
- Items with quantities and modifiers
- Special instructions (highlighted in yellow or red)
- Elapsed time since order placement
Push customer contact details and delivery addresses to the expeditor’s screen or the printed dispatch docket instead.
Setting Up Order Routing by Station (Pizza, Grill, Drinks, Cold Prep)
A single shared screen works for small operations. But once you have distinct stations — a pizza oven, a grill, a fryer, a cold-prep bench — you want each station to see only the items relevant to them.
Tag Menu Items With WooCommerce Categories
This is the foundation. In WooCommerce, every product should belong to a kitchen station category in addition to any customer-facing categories. Examples:
- Menu category (customer sees): “Pizzas,” “Burgers,” “Salads”
- Kitchen category (internal): “Station: Oven,” “Station: Grill,” “Station: Cold”
Use WooCommerce’s built-in product categories or a taxonomy like “Kitchen Station” via a custom taxonomy plugin. FoodMaster reads these categories and can filter the order dashboard on each screen accordingly.
Set Up One Dashboard URL Per Station
On the pizza station tablet, load the dashboard with a filter parameter for the “Oven” category. On the grill station, filter to “Grill.” Each screen shows only what that cook needs to make. A large combo order becomes three simultaneous mini-tickets, one at each station — no more paper being torn into strips.
Color-Code by Order Type
Delivery, pickup, and dine-in have different urgency profiles. A common convention:
- Red border: Delivery (driver is waiting or scheduled)
- Yellow border: Pickup (customer will arrive at scheduled time)
- Green border: Dine-in (fire immediately, table is seated)
- Blue border: Scheduled / Pre-order (don’t start until timer triggers)
FoodMaster’s dashboard supports these visual conventions out of the box, and scheduled orders — a huge deal for pizzerias with lunch pre-orders — automatically move from blue to red when their fire time approaches.
Prioritization Rules
Set rules so that older tickets rise to the top and change color as they age:
- 0–5 minutes: normal
- 5–10 minutes: bold outline
- 10+ minutes: flashing red
These small visual cues drop average ticket times dramatically once staff internalize them.
Integrating Printers, POS, and KDS Together
Most successful restaurant setups aren’t KDS-only — they’re hybrids. The KDS handles prep tickets, while a thermal printer handles receipts, driver dockets, and packaging labels.
Recommended Printer Hardware
Two brands dominate for a reason:
- Epson TM-m30III — reliable, Bluetooth + Ethernet + USB, works with virtually every WooCommerce printing plugin.
- Star TSP143IV — slightly cheaper, excellent driver support, cloud-ready.
Both support LAN printing, which means FoodMaster can send print jobs directly over your local network with no PC in the middle. For automatic printing setup on WooCommerce, our team has a detailed walkthrough on the WPSlash tutorials section that covers driver installation and troubleshooting.
Google Cloud Print Is Dead — What Now?
Google Cloud Print was retired in 2020, and a lot of old tutorials still reference it. In 2026, the standard approaches are:
- Direct LAN printing — FoodMaster sends ESC/POS commands straight to the printer’s IP address.
- CUPS on a Raspberry Pi — great for multi-printer environments; a $50 Pi acts as a print server.
- Cloud-native printers like Star CloudPRNT, which pull jobs from your WooCommerce site over HTTPS.
POS Integration for Unified Reporting
If you also run in-store transactions through a POS (Square Terminal, SumUp, or a WooCommerce POS plugin), make sure all orders — online and in-store — flow into the same
Commission-free ordering
Run restaurant orders on your own WordPress site
FoodMaster adds delivery, pickup, dine-in, POS, and kitchen tools — with zero per-order fees.