On this page
- Set up menus, checkout, and fulfillment options
- Organize menu items as WooCommerce products
- Configure checkout fields for delivery and pickup orders
- Set delivery zones, pickup options, and scheduled time slots
- Manage incoming orders in real time
- Use order statuses to track each step
- Handle notifications, notes, and kitchen handoff
- Speed up prep with automatic order printing
- Coordinate delivery, pickup, and team capacity
- Build separate workflows for delivery and pickup
- Use prep time and slot limits to avoid overload
- Keep drivers and packers aligned on final handoff
- Track performance, reduce errors, and improve the workflow
- Review order history and repeat customer patterns
- Create simple staff rules to prevent missed orders
- Conclusion: The core order management process to keep service fast and accurate
- FAQs
- How do I set up WooCommerce for pickup and delivery?
- What’s the best way to stop too many food orders at once?
- How should I handle special instructions and allergy notes?
- Related Blog Posts
If your food orders come in late, print late, or reach the wrong team, service slips fast. I’d set WooCommerce up like a simple order line: build the menu as products, collect only the checkout details staff need, split delivery from pickup, use clear status steps, and cap order volume with time slots and prep buffers.
Here’s the short version:
- I’d structure menu items with categories, variations, and add-ons so tickets are easy to read.
- I’d trim checkout fields so delivery collects address details, while pickup collects only contact and timing info.
- I’d use separate flows for delivery and pickup to cut mix-ups.
- I’d track each order with plain status steps like Received, In Kitchen, Ready for Pickup, and Out for Delivery.
- I’d make sure notes like allergies, gate codes, and no onions stay visible from checkout to handoff.
- I’d use auto-printing and ticket routing so kitchen teams see orders right away.
- I’d control volume with 20–30 minute lead times and slot caps based on what the kitchen can actually finish.
- I’d review order history, refunds, peak hours, and repeat customers to cut mistakes over time.
A few numbers stand out. Integrated digital ordering with kitchen printers can cut order errors by 15%–25%, and better kitchen printer setup can reduce errors by up to 35%. For time slots, a kitchen that can finish 12 orders per hour should plan around 3 orders per 15-minute window, not more.
| Area | What I’d focus on |
|---|---|
| Menu setup | Categories, variations, add-ons, stock limits |
| Checkout | Delivery vs. pickup fields, notes, full price breakdown |
| Fulfillment | Delivery zones, local pickup, time slots, prep buffers |
| Live orders | Custom statuses, staff ownership, alerts, printing |
| Handoff | Pack-and-check steps, address review, bag staging |
| Performance | Peak-hour reports, item sales, refunds, repeat buyers |
If I wanted WooCommerce to work well for a restaurant, cafe, or takeout shop, this is the core process I’d follow from checkout to completed order.
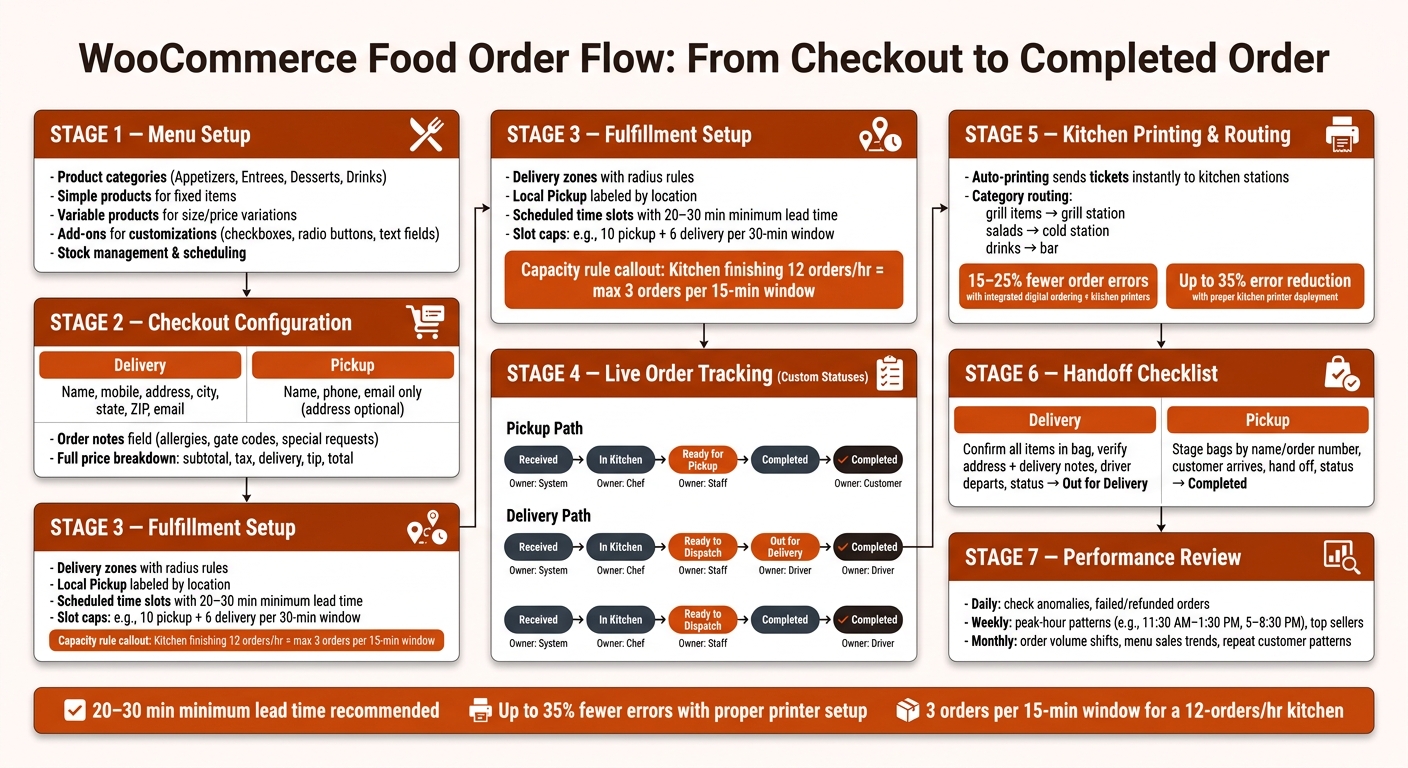
WooCommerce Food Order Flow: From Checkout to Completed Order
Set up menus, checkout, and fulfillment options
Organize menu items as WooCommerce products
Set up your online menu to match the one you use in-store with WooCommerce product categories. Use top-level categories like Appetizers, Entrees, Desserts, and Drinks so customers can browse in a way that feels familiar. It also helps staff find items fast in the admin. During a rush, that matters. A clean structure keeps the order screen easier to scan. You can also use tags like "Spicy", "Gluten-free", or "Family size" to add filtering without making the main menu messy.
For each dish, use simple products for fixed items. Use variable products when one item comes in more than one version, like a 12-inch, 16-inch, or 18-inch pizza with its own price and SKU. For extras, product add-ons usually make more sense. Things like checkboxes, radio buttons, or a short text field let customers customize without turning the product page into a wall of options. That way, the order line stays clear for staff, like "16-inch House Pizza – Extra cheese, No onions."
After you structure items this way, staff can move orders through pickup, prep, and dispatch with less back-and-forth.
You should also control availability at the product level. Turn on stock management so WooCommerce marks items as out of stock when they sell out. If you run specials or limited-time dishes, use scheduling to hide them outside service hours.
Configure checkout fields for delivery and pickup orders
Delivery orders need the basics: name, mobile number, address, city, state, ZIP, and email. Pickup orders need less: name, phone, and email. For pickup, make the street address optional. Cut fields that don’t fit food orders. "Company Name" and "Second Address Line" just slow people down.
The order notes field matters a lot. Put it where customers can see it, and keep it open as free text so they can leave details like "Ring doorbell, gate code 1234" or "No cut pizza." At checkout, show a full U.S.-style price breakdown with subtotal, tax, delivery, tip, and total. That makes it easier for staff to check charges before prep begins.
Set delivery zones, pickup options, and scheduled time slots
Use shipping zones or radius rules to set delivery areas, and name each method clearly. That helps route orders to the right team without manual sorting.
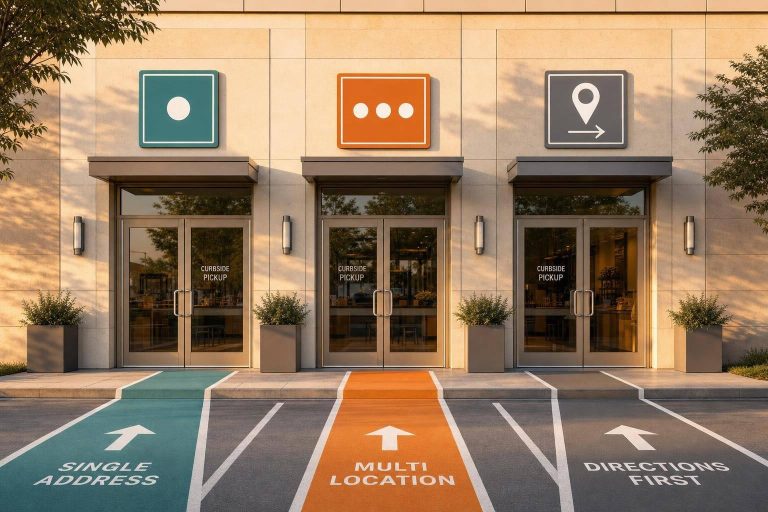
For pickup, add a free Local Pickup method and label it by location so staff know where the order should be prepared. If you offer both delivery and pickup, use a plugin that lets customers choose their fulfillment method at checkout and add a time selection. It keeps order details neat and easy to act on.
Scheduled slots, prep buffers, and per-slot limits help you avoid overload. When those checkout rules are in place, you’re ready to deal with orders as they come in.
Manage incoming orders in real time
Once checkout is in place, orders need a fast, repeatable path through the kitchen. The aim is simple: a clear flow that every staff member can follow when things get busy.
Use order statuses to track each step
The fastest kitchens connect each order to one next step and one owner.
WooCommerce comes with default statuses like Pending payment, Processing, On hold, Completed, Cancelled, Refunded, and Failed. Those are fine for general ecommerce, but they don’t line up neatly with how a restaurant works.
Most food businesses do better with service-based statuses that match the actual ticket flow. With a custom order status plugin like WooCommerce Order Status Manager, you can add or rename statuses so they fit the way your team works:
| Status | What It Means | Who Acts | What Triggers the Next Step |
|---|---|---|---|
| Received | The order is paid and visible in WooCommerce | Front counter or order coordinator | Staff reviews the details and timing, then sends the ticket to the kitchen |
| In Kitchen | Prep is actively underway | Kitchen lead or line cook | All items are cooked, packed, and checked against the ticket |
| Ready for Pickup | The order is packed and waiting for the customer | Front counter | Customer arrives and staff hand over the order |
| Ready to Dispatch | The order is packed and waiting for a driver | Packing staff or dispatcher | Driver collects the order and staff mark it Out for Delivery |
| Out for Delivery | A driver has collected the order and is on the way | Driver coordinator or dispatcher | Driver confirms drop-off, then staff mark the order Completed |
| Completed | The order has been delivered or picked up and the ticket is closed | Manager or front counter | Used for reporting, refunds, and follow-up if needed |
Assign one owner to each status. If no one owns the step, tickets can stall during the rush.
Handle notifications, notes, and kitchen handoff
Send New Order alerts to the staff who monitor live tickets. Send customers one confirmation after payment and one update at pickup or dispatch. That gives the next person what they need without making them stop and double-check.
Instructions like no onions or ALLERGY: NO PEANUTS need to stay with the ticket through every handoff. Front-of-house staff should review notes as soon as an order hits Received, and those notes should stand out on printed tickets and kitchen screens. For high-volume shops, a kitchen display system can replace paper tickets entirely. For allergy-related requests, bold or uppercase text on the ticket makes them easier to spot at a glance.
Each handoff should have one clear trigger, like a status change or a printed ticket.
Speed up prep with automatic order printing
If status changes still depend on staff staring at a screen, printing helps close that gap.
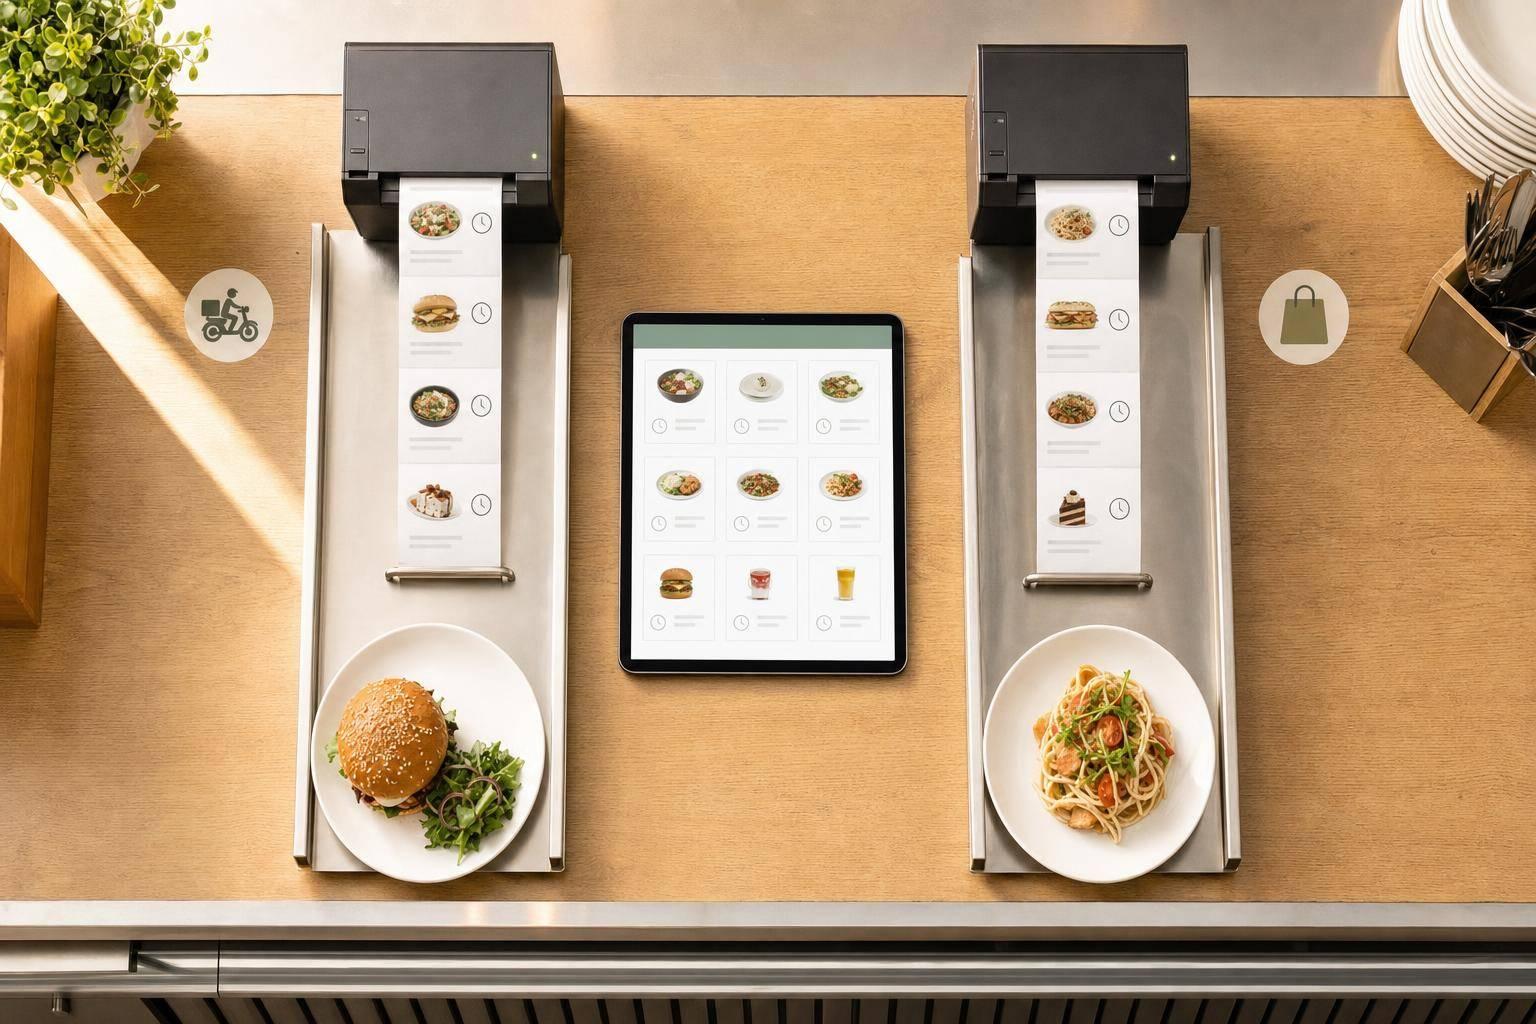
Manual screen checks slow live service and can lead to mistakes. Automatic thermal printing sends exact tickets to the kitchen in seconds and cuts retyping errors.
Studies show integrated digital ordering with kitchen printers can reduce order errors by 15–25%, and proper kitchen printer deployment can reduce errors by up to 35% compared with standard receipt printer setups.
FoodMaster supports automatic order printing through dedicated desktop software for Windows and Mac, which manages the connection between WooCommerce and thermal printers. In multi-station kitchens, it can route items by category – grill items to the grill station, salads to the cold station, drinks to the bar – so each team can start prep at the same time instead of waiting for one all-in-one ticket.
sbb-itb-7e654f7
Coordinate delivery, pickup, and team capacity
Once orders start coming into WooCommerce, the next step is simple: split delivery from pickup so each order lands with the right team at the right time.
That matters more than ever. Delivery, pickup, and takeout now account for most limited-service restaurant traffic, which means WooCommerce has to line up kitchen timing with driver availability and customer pickup windows.
Build separate workflows for delivery and pickup
Delivery and pickup may look similar on the surface, but they run on different info, different staff, and different points where things can go wrong.
| Delivery | Pickup | |
|---|---|---|
| Required data | Full address, delivery instructions, phone number, preferred window | Customer name, phone number, requested pickup time, any curbside or allergy notes |
| Key statuses | Received → In Prep → Out for Delivery → Completed | Received → In Prep → Ready for Pickup → Completed |
| Assigned staff | Packer + dispatcher or driver coordinator | Packer + front-counter staff |
| Common failure points | Wrong address, late dispatch, driver leaving before the order is finished | Customer arriving before the order is ready, bag left unclaimed, cold food |
The split should happen right at checkout. Use different fields, different status paths, and different team ownership for each order type.
Once those two tracks are in place, lead times and slot caps help keep order volume from getting out of hand.
Use prep time and slot limits to avoid overload
WooCommerce needs scheduling controls. The two that matter most are minimum lead time and orders per slot.
A minimum lead time of 20–30 minutes gives the kitchen enough breathing room and helps stop customers from choosing a pickup window before the food can be finished. Slot limits put a hard cap on how many orders can land in each window. For example, you might allow 10 pickup orders and 6 delivery orders per 30-minute slot. Delivery limits should stay lower because drivers, not the kitchen, usually slow things down.
| ASAP Orders | Scheduled Time-Slot Orders | |
|---|---|---|
| Customer convenience | High – immediate gratification | Moderate – requires planning ahead |
| Kitchen load control | Low – unpredictable spikes | High – capped per window |
| Delay risk | High during lunch and dinner rushes | Low when lead times are respected |
| Best fit | Fast-casual takeout, small menus | Made-to-order dinner service, larger tickets |
Set slot limits from what your kitchen can actually handle, not what sounds good on paper. If the kitchen can finish 12 orders per hour without the line falling apart, that works out to 3 orders per 15-minute window, not 5. Those numbers should shift when staffing changes or the menu gets harder to execute, especially on Friday nights or around holidays. Sometimes one or two extra orders is all it takes to jam the whole system.
Keep drivers and packers aligned on final handoff
Most order mistakes happen at the handoff stage. One person thinks someone else checked the notes. A drink never makes it into the bag. A driver heads out before the kitchen finishes the last item on a two-part ticket.
Use the ticket as the last pack-and-check step:
- Confirm every item on the ticket is in the bag
- Review any special instructions
- For delivery, verify the address and delivery notes before the driver leaves
- For pickup, stage bags by name or order number so front-counter staff can hand them off fast
Mark the order the moment it leaves the kitchen so both staff and customers see the right status. That handoff record also helps with performance review and repeat-order tracking.
Track performance, reduce errors, and improve the workflow
Use your order data to tighten service after every rush. The information in your WooCommerce Orders list can help you make next week’s service better than this week’s.
Review order history and repeat customer patterns
Filter orders by the last 7 or 30 days to check volume, revenue, and status mix – completed, failed, and refunded. Export orders to CSV and group them by time block, like 11:30 AM–1:30 PM or 5:00 PM–8:30 PM, to see exactly when your kitchen gets slammed. That makes staffing gaps easier to spot and shows where slot limits may need to be tighter.
FoodMaster also lets you filter order stats by fulfillment type – delivery or pickup – inside the plugin. That gives you a clean view of which channel brings in more orders on a given day. You can also use customer history to spot repeat buyers, average ticket size, and tipping patterns. Those details make loyalty programs smarter and help you give extra attention to high-value regulars during peak windows.
WooCommerce’s product-level sales reports show item performance over any date range, including total units sold, gross revenue, and net sales per menu item. Sort by quantity to find your top sellers and the dishes that barely move. If an item keeps sitting at the bottom, it may need a recipe change, a portion update, or a price fix.
Once you know what sells and when orders pile up, put a simple live-service routine in place.
Create simple staff rules to prevent missed orders
Data matters only if the team uses it the same way every time. During rush periods, assign one person to watch the Orders screen full-time, sorted by time, with new processing orders at the top. Each incoming order should be checked for delivery address, pickup time, customer notes, and payment status before it reaches the kitchen.
Turn those patterns into a short daily checklist the team can follow without guessing.
A few repeatable rules can make a big difference:
- Mark items out of stock as soon as the kitchen runs out. If customers order food you can’t make, refunds and complaints follow fast.
- Confirm that every order prints before it moves to prep. Alternatively, you can use a kitchen display system to digitize the workflow.
- Require a status update at every handoff. That gives you a trail to review later.
- For delivery, verify the address and any special instructions before the driver leaves.
- For pickup, stage bags by name or order number so front-counter staff can hand them off fast.
These rules cut down on missed tickets, wrong bags, and late handoffs.
Conclusion: The core order management process to keep service fast and accurate
The process is simple. Set up your WooCommerce menu with accurate products, clear variations, and real stock controls. Configure checkout to collect the right delivery or pickup data – U.S.-formatted addresses, phone numbers, time slot preferences, and any special instructions. When orders come in, use consistent statuses to move each ticket from receipt to completion, and let FoodMaster handle automatic printing and kitchen routing so nothing sits unseen.
Control capacity with slot limits and prep-time rules based on your actual order data. Then review that data on a daily, weekly, and monthly basis: daily for anomalies, weekly for peak-time patterns and top sellers, and monthly for shifts in order volume or menu sales. Owners who follow this loop – and train staff to follow it too – end up with fewer missed orders, faster service, and a clearer view of where revenue is coming from.
FAQs
How do I set up WooCommerce for pickup and delivery?
In FoodMaster, open the setup wizard or the main settings panel. Under General settings, turn on delivery and pickup for customers.
Then set your order rules. Add minimum order amounts, delivery fees by distance or as a flat rate, delivery zones, and a pickup lead time so customers know when their order will be ready.
What’s the best way to stop too many food orders at once?
Use scheduled order queues to limit how many orders you take in each time slot, so order volume stays within what your team can actually handle.
If the kitchen starts getting slammed, you can also switch delivery off from your dashboard. Dynamic prep times add extra buffer based on your current order queue, which helps set clear customer expectations during busy periods.
How should I handle special instructions and allergy notes?
Use FoodMaster’s automated features to collect special instructions and allergy notes at checkout, then attach them to the WooCommerce order on their own.
Turn on the KDS so the kitchen can see notes and modifiers in real time. If you use thermal printers, make sure customer notes and special requests show up clearly on kitchen receipts – especially severe allergy alerts.
Related Blog Posts
Commission-free ordering
Run restaurant orders on your own WordPress site
FoodMaster adds delivery, pickup, dine-in, POS, and kitchen tools — with zero per-order fees.