On this page
- What Is a Kitchen Display System and Why Your WooCommerce Restaurant Needs One
- KDS vs. Printed Dockets: The Real Differences
- Scenarios Where a KDS Pays for Itself Fast
- How KDS Software Connects to WooCommerce Orders
- Choosing the Right KDS Solution for Your Restaurant Type
- KDS Options Compared
- Matching KDS to Restaurant Type
- Step-by-Step: Setting Up a Tablet-Based KDS With WooCommerce and FoodMaster
- 1. Prepare the Hardware
- 2. Create a Dedicated Kitchen User
- 3. Open the Order Manager Screen
- 4. Configure Auto-Refresh and Sound
- 5. Set Up Order Statuses
- 6. Assign Products to Stations (Optional but Powerful)
- 7. Test With a Live Order
- Common Troubleshooting
- Configuring Prep Times, Order Routing & Station Assignments
- Setting Realistic Prep Times
Walk into any busy restaurant kitchen on a Friday night and you’ll see the same scene: printed tickets curling on the pass, a line cook squinting at smudged handwriting, and someone yelling “where’s table 12’s order?” for the third time. Now imagine that same kitchen with a bright screen showing every order in real time, color-coded by prep time, automatically routed to the right station. That’s what a WooCommerce Restaurant (Rank #1 on Google Maps)”>WooCommerce Restaurant Website (2026)”>WooCommerce Restaurant for Faster Order Prep”>Kitchen Display System (KDS) does, and if you’re running a restaurant on WooCommerce, you’re already 80% of the way to having one.
This guide walks you through exactly how to add a KDS to a WordPress restaurant site — the technical flow, the hardware choices, the setup process, and the metrics you should actually track once it’s running.
What Is a Kitchen Display System and Why Your WooCommerce Restaurant Needs One
A Kitchen Display System is a digital screen (or set of screens) mounted in the kitchen that receives incoming orders directly from your ordering platform. Instead of a thermal printer spitting out paper tickets, orders appear as live “cards” on a monitor. Staff tap or click to move each order through statuses like New → Preparing → Ready, and the system tracks how long each ticket has been open.
For a WooCommerce-powered restaurant, this is more than a cosmetic upgrade. When a customer places an order through your WordPress site, the order data is already digital — it just needs a screen to display it on. Paper printouts are actually the extra step, not the natural one.
KDS vs. Printed Dockets: The Real Differences
- Legibility: No more faded thermal prints or torn tickets. Every modifier (“no onions, extra pickles, gluten-free bun”) is crystal clear.
- Timing: Every ticket carries a live timer. Cooks instinctively prioritize the oldest orders instead of whichever paper is closest.
- Routing: A burger and a milkshake on the same order can appear on two different screens — grill and drinks — automatically.
- Cost over time: Thermal paper, ribbons, and printer maintenance add up. A tablet lasts years.
- Accountability: The KDS logs who bumped which ticket and when, giving you real data instead of anecdotes.
Scenarios Where a KDS Pays for Itself Fast
A pizzeria doing 60+ online orders on a Friday night will lose fewer tickets and stop double-making pies. A ghost kitchen running three virtual brands from one physical space needs color-coded routing to keep brands separate. A dine-in restaurant using QR table ordering gets orders straight from the guest’s phone to the kitchen with zero staff involvement — no server relay, no missed modifiers.
In every one of these cases, a KDS typically pays for itself within a few months, mostly through fewer remakes and faster table turns.
How KDS Software Connects to WooCommerce Orders
Understanding the flow makes troubleshooting infinitely easier later. Here’s what happens when a customer places an order on a WooCommerce restaurant site:
- Customer completes checkout on your WordPress site (or your ordering app).
- WooCommerce creates an order and assigns it a status — usually Processing once payment clears, or a custom status like New Order for cash-on-delivery.
- WooCommerce fires an action hook (
woocommerce_new_orderor a status transition hook). - Your KDS plugin listens for that hook — either directly via PHP, or through the WooCommerce REST API and webhooks.
- The order is pushed to a kitchen-facing screen, which polls for updates every few seconds or receives them via a live connection.
- Kitchen staff tap through statuses: New → Preparing → Ready. Each change writes back to WooCommerce, so your admin dashboard, delivery drivers, and customer-facing “order tracking” pages all stay in sync.
The most common approach for WordPress restaurants is a plugin that ships with a built-in order manager screen. FoodMaster (formerly WooFood) includes this natively: a browser-based order screen with auto-refresh, sound alerts, station routing, and one-click status changes. Because it runs on the same WordPress install, there’s no external API to configure and no third-party subscription.
Hardware-wise, the KDS itself doesn’t need to be exotic:
- Consumer tablets (iPad, Android): Cheapest and most flexible. Mount with a VESA or countertop stand. Perfect for most single-station kitchens.
- Dedicated commercial KDS displays: Grease-resistant, heat-tolerant, often with bump bars. Overkill for most independent restaurants but worth it for high-volume kitchens.
- Raspberry Pi + monitor: A $40 Pi running Chromium in kiosk mode, pointed at your KDS URL. Popular with tech-savvy owners who want a permanent, boot-into-KDS setup for under $150 total including the screen.
- Old laptops: Perfectly fine as a starting point. Just keep the screen on and lock down the browser.
The software doesn’t care what the screen is — it just needs a browser and a stable Wi-Fi connection.
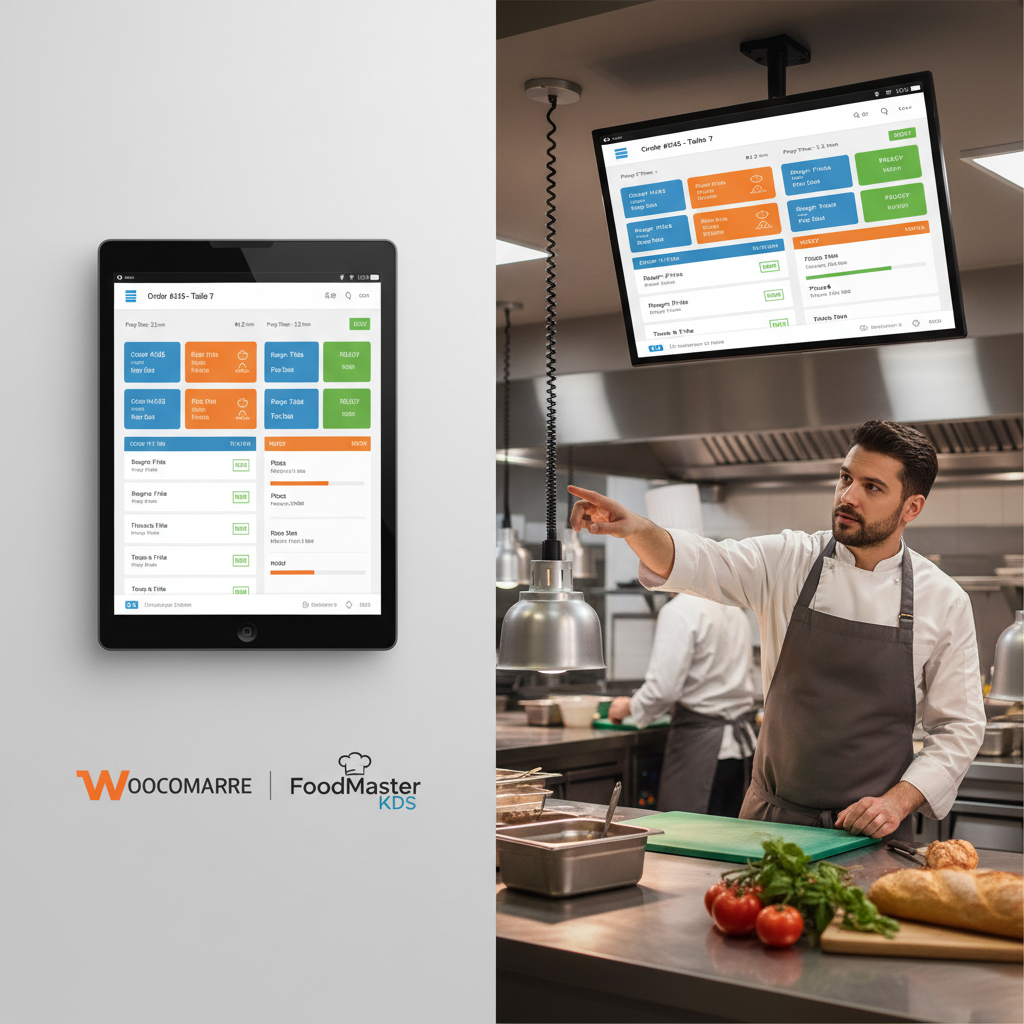
[IMAGE: A stainless-steel restaurant kitchen with a mounted tablet showing color-coded order tickets, cooks working at a grill station in the background]
Choosing the Right KDS Solution for Your Restaurant Type
Not every restaurant needs the same setup. A single-owner pizzeria has very different needs than a five-location burger chain. Here’s how the main categories stack up:
KDS Options Compared
| Solution | Approx. Cost | Integration | Offline Mode | Best For |
|---|---|---|---|---|
| FoodMaster Order Manager | Included with plugin (one-time) | Native WooCommerce, zero API setup | Works on local network | Any WordPress restaurant, single or multi-station |
| Fresh KDS | Monthly subscription per screen | Requires POS bridge | Limited | Square POS users |
| Square KDS | Monthly subscription per device | Locked to Square ecosystem | Yes | Restaurants already on Square hardware |
| Toast KDS | Enterprise contract | Locked to Toast POS | Yes | Larger chains fully on Toast |
| DIY tablet + printer app | Very low | Manual per platform | Depends | Micro-restaurants with under 20 orders/day |
The pattern is clear: third-party KDS apps are excellent if you’re already inside their ecosystem, but they force you to keep paying monthly and often can’t see orders that come from your WordPress site directly. A native WooCommerce KDS keeps everything in one place — orders, menu, customers, and kitchen — with no data flowing to outside services.
Matching KDS to Restaurant Type
- Pizzeria: Prioritize a single main screen with long prep timers (pizzas take 8–14 minutes) and clear modifier display for toppings. Sound alerts on new orders matter more than multi-station routing.
- Burger joint / fast casual: Two screens — one for the grill, one for the fryer and assembly. Short prep times (3–6 min) mean bump-time discipline is critical.
- Multi-station kitchen (sushi, grill, cold, dessert): Route items automatically by product category. Each station only sees what it makes.
- Ghost kitchen / virtual brands: Color-code by brand. Staff can be working on three “restaurants” from one kitchen without confusing tickets.
Step-by-Step: Setting Up a Tablet-Based KDS With WooCommerce and FoodMaster
Here’s the actual setup path most restaurant owners follow. I’ll assume you already have WooCommerce and FoodMaster installed — if not, our FoodMaster plugin page walks through the initial install.
1. Prepare the Hardware
Grab a tablet (a 10-inch Android tablet from around $120 works fine, or a refurbished iPad). Mount it somewhere the line cooks can see without leaving their station — usually above the pass or beside the expo counter. Plug it into permanent power; you never want the screen dying mid-service.
2. Create a Dedicated Kitchen User
In WordPress → Users → Add New, create a user with the Shop Manager role (or a custom role limited to order management). This keeps kitchen staff out of your product pricing and settings. Use a memorable but restaurant-only password.
3. Open the Order Manager Screen
Log into WordPress on the tablet’s browser and navigate to the FoodMaster order manager screen (found under the FoodMaster menu in wp-admin). This is the KDS view — a full-screen dashboard of live orders.
4. Configure Auto-Refresh and Sound
Inside the order manager settings, enable:
- Auto-refresh: every 10–15 seconds is a good balance between responsiveness and server load.
- Sound alerts: assign a distinct chime to new orders. Cooks learn the sound within a shift.
- Full-screen mode: hides the WordPress admin bar so the entire tablet becomes a KDS.
5. Set Up Order Statuses
By default, WooCommerce orders arrive as Processing. FoodMaster adds custom statuses like Preparing, Ready for Pickup, and Out for Delivery. Configure the flow so that a new online order lands in the “New” column, staff bump it to “Preparing” when they start cooking, and to “Ready” when it’s plated. Each bump automatically updates the customer-facing tracking page.
6. Assign Products to Stations (Optional but Powerful)
If you have more than one screen, tag each product with a category like “Grill”, “Fryer”, “Cold Prep”, or “Drinks”. On each tablet, filter the order manager view to only show tickets containing items from that station. A single order for a burger, fries, and a soda will now appear on three screens simultaneously — and each station bumps their portion independently.
7. Test With a Live Order
Place a test order from your phone using a real product. Watch the ticket appear on the tablet. Bump it through each status. Confirm the customer receives the correct notifications at each step. Do this before your first real service, not during it.
Common Troubleshooting
- Tablet screen keeps sleeping: Install a “keep screen on” app or, on iPad, set Auto-Lock to Never in Display settings.
- Orders not appearing: Check that new orders are being created with a status the KDS is filtering for. Also check the tablet’s Wi-Fi.
- Sound not playing: Browsers block autoplay audio until the user interacts with the page. Tap the screen once after loading to unlock audio.
- Screen refreshing too slowly: Reduce auto-refresh interval, but don’t go below 5 seconds or you’ll hammer your server on busy nights.
[IMAGE: Close-up of a tablet screen displaying multiple order tickets in different colors, with timers showing elapsed prep time on each ticket]
Configuring Prep Times, Order Routing & Station Assignments
Getting the KDS visible is step one. Getting it to actually make your kitchen faster requires thoughtful configuration.
Setting Realistic Prep Times
Every product in your menu should have a prep time attached. In FoodMaster, this is set per product (or per category as a default). Be honest here — if a pizza actually takes 12 minutes from order to oven-out, don’t put 8 minutes because it sounds faster. Underpromising and delivering is how you keep review scores above 4.5.
Prep times feed into two places:
- The customer-facing ETA shown at checkout (“Ready in ~25 minutes”)
- The KDS ticket timer, which turns yellow then red when the ticket runs over
Dynamic Prep Times by Order Vol
Commission-free ordering
Run restaurant orders on your own WordPress site
FoodMaster adds delivery, pickup, dine-in, POS, and kitchen tools — with zero per-order fees.