On this page
- Create a Restaurant Online Ordering System with WordPress & WooCommerce
- Quick comparison
- 1. Install FoodMaster and set the restaurant basics
- Install the plugin and activate the license
- Set store location, currency, and local time
- Turn on the core ordering features
- 2. Build the menu with products, categories, and add-ons
- Create menu categories and menu items
- Add size choices, extras, and special instructions
- Control item availability by day or service period
- 3. Set pickup, delivery, and time slot rules
- Choose order types and delivery area rules
- Configure opening hours and order time slots
- Compare service settings by order type
- 4. Finish checkout, payments, taxes, and notifications
- Keep checkout short and collect only the right fields
- Enable payments and set US tax rules
- Set order emails, status flow, and kitchen printing
- 5. Test the full order flow before launch
- FAQs
- How do I choose the right lead times for my kitchen?
- What should I do if delivery orders fall outside my service area?
- How can I test that time slots and checkout rules work correctly?
- Related Blog Posts
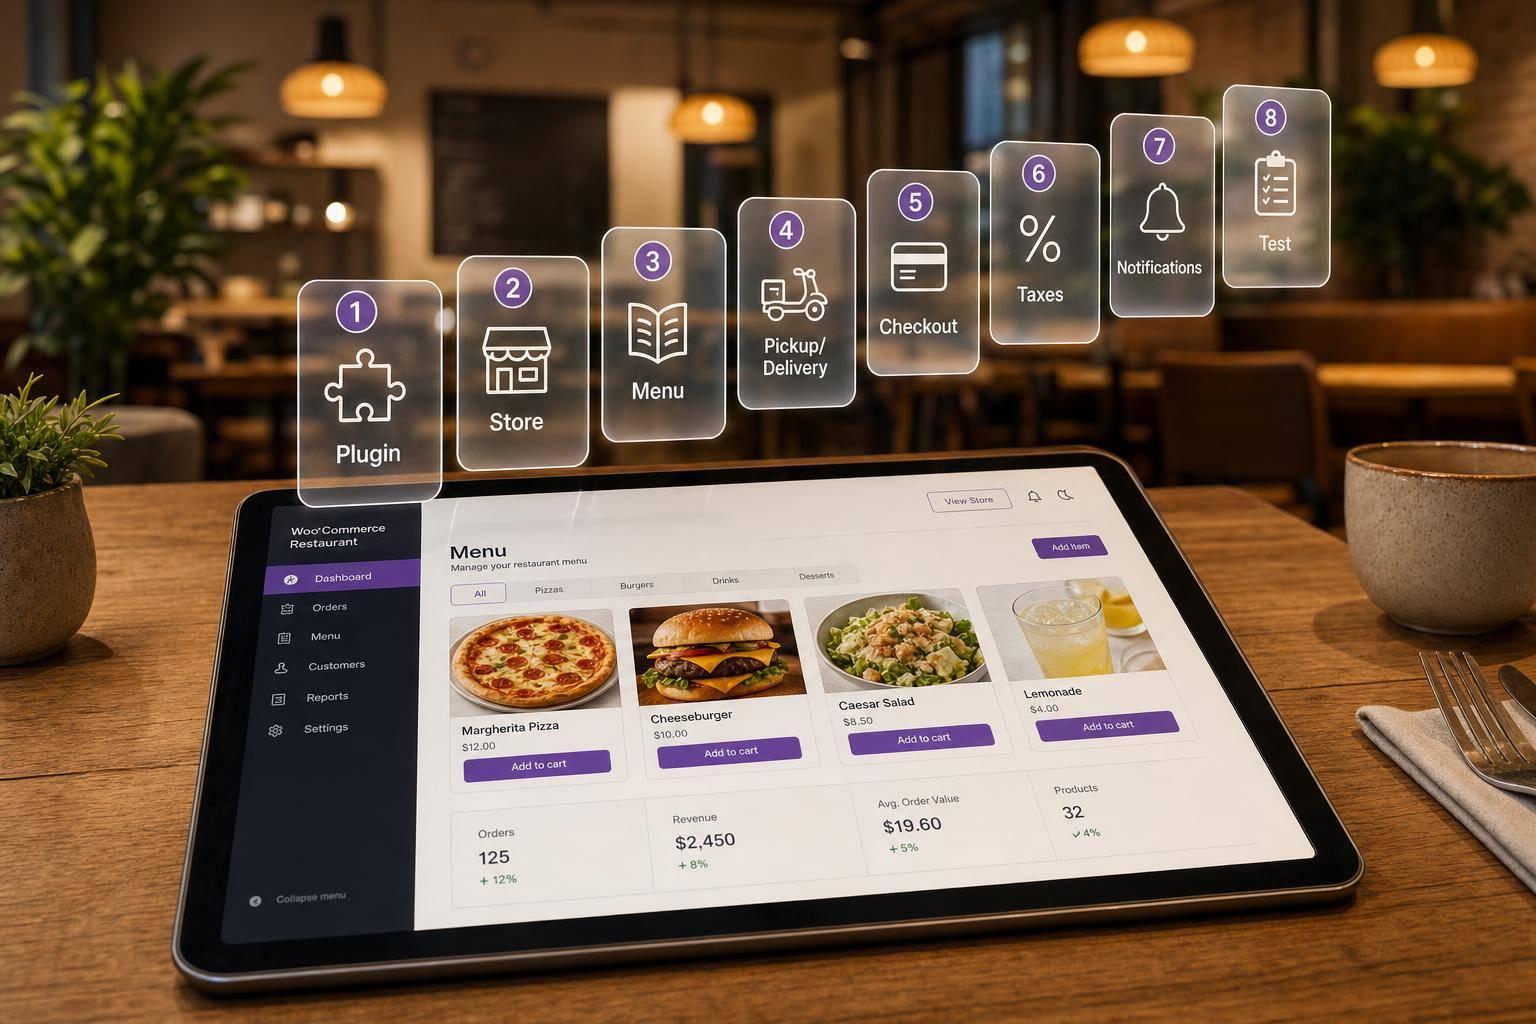
If I set up a restaurant ordering site in the wrong order, I can end up with bad time slots, wrong delivery coverage, or orders that hit the kitchen when it’s closed. The fix is simple: I set the plugin first, then store details, then menu items, then pickup and delivery rules, then checkout, taxes, alerts, and testing.
Here’s the full setup path in plain English:
- Install FoodMaster and activate the license
- Set store address, USD, U.S. date format, and local time zone
- Turn on online ordering, pickup, delivery, and blocked checkout after hours
- Build the menu with categories, products, prices, images, and add-ons
- Set item timing rules for breakfast, lunch, dinner, or limited items
- Configure delivery zones, lead times, and time slots
- Keep checkout short and collect only the fields each order type needs
- Turn on card payments, wallet pay, and one offline option
- Set U.S. sales tax rules by shipping address
- Make sure emails, status updates, dashboard alerts, and kitchen printing work
- Run at least 2 full test orders: one pickup and one delivery
A few settings have the biggest impact on day-to-day order flow:
- 15–20 minutes is a common pickup lead time
- 30–60 minutes is a common delivery lead time
- 15-minute or 30-minute slots fit most kitchens
- A 30-minute closing buffer helps stop late orders
- Delivery minimums often start around $20.00 to $30.00+
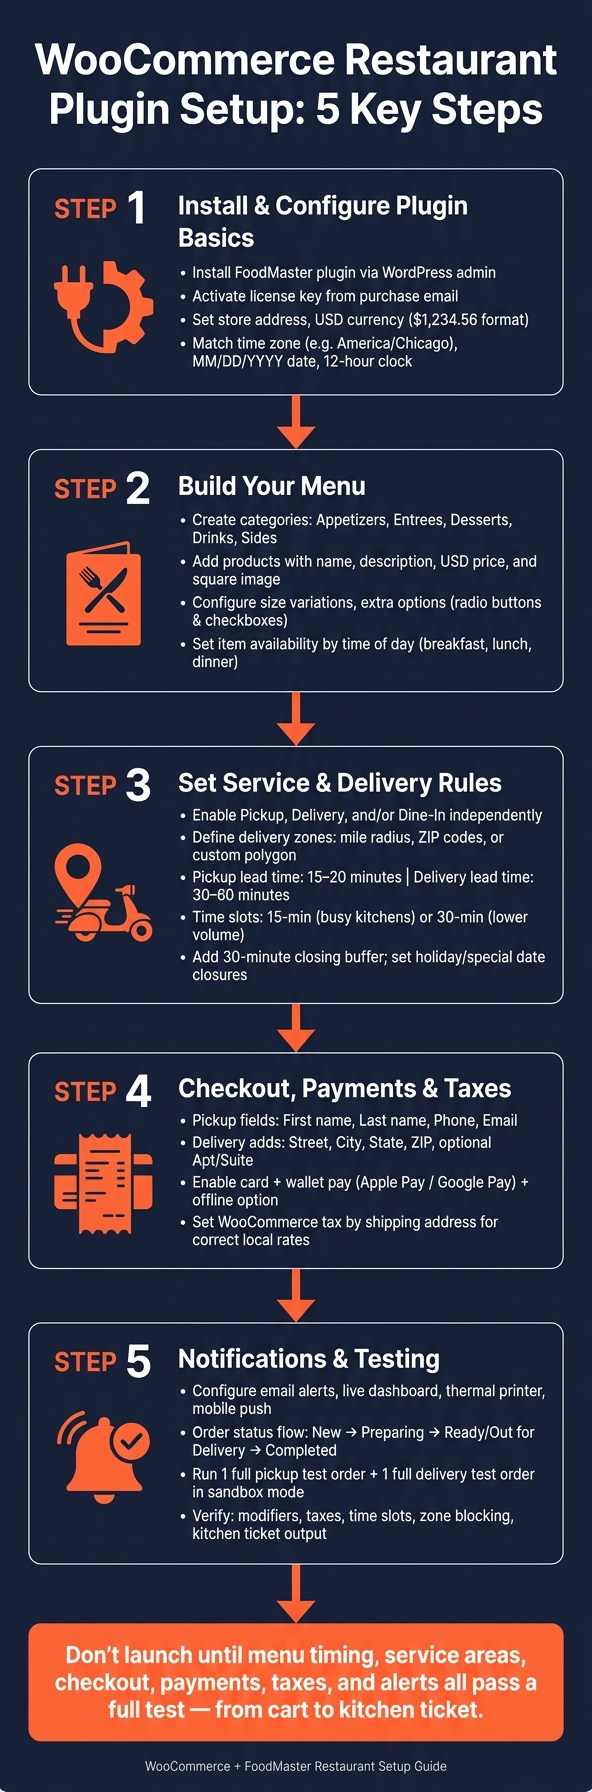
WooCommerce Restaurant Plugin Setup: 5-Step Process Guide
Create a Restaurant Online Ordering System with WordPress & WooCommerce
Quick comparison
| Area | What I set | What it controls |
|---|---|---|
| Plugin basics | License, restaurant type, ordering tools | Whether the restaurant features work at all |
| Store settings | Address, $1,234.56, MM/DD/YYYY, 12-hour time |
Tax, delivery checks, and scheduling |
| Menu | Categories, products, extras, notes | What customers can order |
| Service rules | Pickup, delivery, dine-in, zones, lead times (including dynamic pickup times) | When and where orders can be placed |
| Checkout and payments | Fields, payment gateways, offline pay | How customers finish the order |
| Taxes and alerts | Tax rates, emails, printer, status flow | Staff follow-up and order handling |
| Testing | Pickup and delivery test orders | Finds setup errors before launch |
In short: I don’t launch until menu timing, service areas, checkout, payments, taxes, and alerts all pass a full test from cart to kitchen ticket.
1. Install FoodMaster and set the restaurant basics
Install the plugin and activate the license
Start in your WordPress admin. Unzip the download, then upload the main plugin ZIP from bundle/Files/Main Plugin through Plugins → Add New → Upload Plugin. Click Install Now, then Activate.
Once it’s active, you’ll see a FoodMaster menu in the WordPress sidebar. The plugin then prompts you to run its 7-step Setup Wizard. That wizard takes you through your restaurant type, store details, working hours, and ordering settings. Open FoodMaster settings and finish the wizard before you start building the menu.
Next, go to FoodMaster → Settings → License, paste in the license key from your purchase email, and click Activate License. This step gives you access to updates and the restaurant features needed for live orders.
Set store location, currency, and local time
Go to WooCommerce → Settings → General and enter your restaurant address. WooCommerce and FoodMaster use that address to help with sales tax setup and delivery coverage rules, like radius limits or ZIP code restrictions.
On that same screen, set the currency to USD and format prices as $1,234.56.
Then head to Settings → General in WordPress and match the Time Zone to your restaurant’s location, such as America/Chicago. Set the Date Format to m/d/Y (MM/DD/YYYY) and the Time Format to g:i A for a 12-hour clock, like 10:30 AM. FoodMaster uses these WordPress settings for scheduled ordering.
Turn on the core ordering features
Now switch on the main ordering options: online ordering, pickup, delivery, block checkout outside operating hours, automatic order printing, and the mobile-friendly menu layout.
Two settings matter a lot here. Block checkout outside operating hours stops customers from submitting orders when your kitchen isn’t staffed. Kitchen printing sends new orders straight to a kitchen printer, so staff don’t have to keep refreshing a screen to catch them.
Before you add even one menu item, run a test order with a sandbox payment method. Check that it shows up in WooCommerce → Orders, sends an email notification, and prints the right way if a kitchen printer is connected. It’s a small step, but it saves a lot of hassle later. After that, you’re ready to build menu categories, products, and add-ons.
2. Build the menu with products, categories, and add-ons
Create menu categories and menu items
Set up categories that mirror your actual menu, so customers can order fast and get it right the first time: Appetizers, Entrees, Desserts, Drinks, and Sides. This matters even more on mobile, where people want simple, fast navigation.
Each dish should be its own WooCommerce product. Give it a clear name, a short description with key ingredients and common allergens, a USD price shown like $14.00, and a high-quality image. Square images work best because they keep the menu grid neat and consistent.
After the main menu structure is ready, add the choices and timing rules that fit how your kitchen runs.
Add size choices, extras, and special instructions
Use WooCommerce variations for simple size options. For items with more than one choice set, like pizza, burgers, or combo meals, use FoodMaster’s Extra Options.
Use radio buttons when customers should pick just one option, like cooking preference (Rare / Medium / Well Done) or crust style (Thin / Regular / Stuffed +$2.00). Use checkboxes for extras people can stack, like toppings or add-ons. If an entree combo comes with a side, make that a required selection – fries, salad, or soup – so the item can’t go into the cart without a choice. You can also apply one option group to an entire category, which cuts down on repeated setup.
For special instructions, keep it simple. A short free-text field works well next to preset choices like No onions, Sauce on the side, or Extra crispy. That mix gives customers some freedom without turning kitchen tickets into a mess.
Control item availability by day or service period
Use item availability to hide dishes when staffing, ingredients, or service hours don’t line up with demand. FoodMaster supports hourly product availability, so you can limit items by time and day. Use it for breakfast, lunch, dinner, and weekend-only items.
Time-based availability helps stop orders you can’t fill. Start with the items that are most sensitive to timing, such as:
- dishes that need a set prep window
- items that use ingredients that sell out early
- dishes that only appear on a limited service menu
Next, use pickup, delivery, and time-slot rules to control when each order type is available.
sbb-itb-7e654f7
3. Set pickup, delivery, and time slot rules
Choose order types and delivery area rules
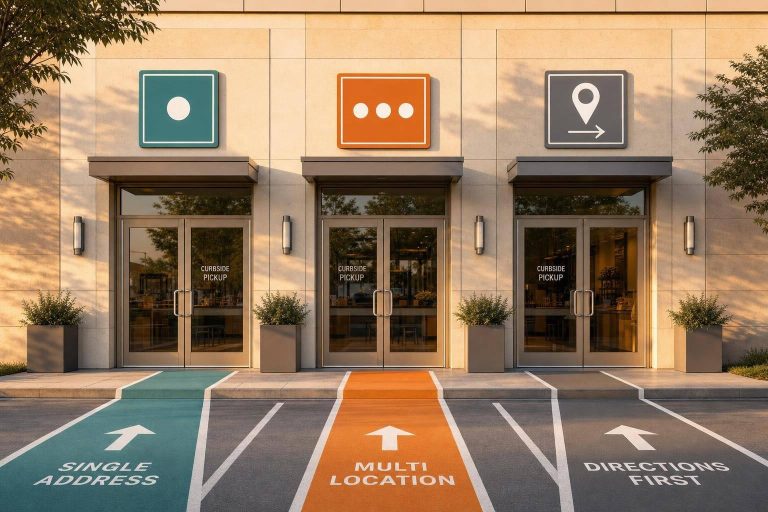
FoodMaster lets you turn Pickup, Delivery, and Dine-in on or off one by one in the plugin settings. That means you can keep things simple and offer only the order types your team can handle right now.
For delivery areas, you have a few ways to set the rules:
- A mile radius around your address
- A list of ZIP codes
- A custom polygon drawn on a Google Map
Inside each zone, you can set a minimum order amount and a delivery fee. If a customer enters an address outside those zones, FoodMaster stops checkout and shows an out-of-area message.
For pickup, set a lead time of 15 to 20 minutes so the first available slot starts after your prep window. For delivery, add enough time for both prep and travel.
Once that part is done, the next step is opening hours and slot limits.
Configure opening hours and order time slots
Set separate opening hours for each order type. A common setup is 11:00 a.m.–2:30 p.m. for lunch and 5:00 p.m.–9:30 p.m. for dinner. This helps stop orders from coming in during that awkward mid-afternoon gap, when the kitchen may be busy prepping but not ready to serve.
It also helps to add a 30-minute closing buffer before the kitchen shuts down. Use Special Dates for holiday hours or full closures.
For time slots, 15-minute intervals are a good fit for busy counter-service spots. 30-minute intervals tend to work better for smaller kitchens with lower order volume. Set a maximum number of orders per slot, and FoodMaster will hide full slots on its own and move customers to the next open window.
Compare service settings by order type
Use these settings as a starting point.
| Setting | Pickup | Delivery | Dine-In |
|---|---|---|---|
| Minimum Order | $0 | $20–$30+ (tiered by zone) | $0 |
| Lead Time | 15–20 minutes | 30–60 minutes | Immediate |
| Slot Length | 15 or 30 minutes | 30 minutes | N/A |
| Fees | None | Flat or zone-based | None |
After the service rules are in place, move on to checkout, payments, taxes, and notifications.
4. Finish checkout, payments, taxes, and notifications
Keep checkout short and collect only the right fields
Once your order types and time slots are ready, tighten up checkout so customers can place an order without getting slowed down.
Less friction usually means more completed orders. For pickup, ask for:
- First name
- Last name
- Phone
For delivery, add street, city, state, ZIP, and an optional apartment or suite field. If a field doesn’t help you fulfill the order, cut it.
Add one clear Order Notes field and label it like this: "Notes for allergies, substitutions, or pickup instructions." That gives customers one place to share details without turning checkout into a form marathon.
Next to the phone field, add a short explanation so people know why you’re asking. Something like "In case we have a question about your order." works well.
Enable payments and set US tax rules
Compare and set up payment gateways by choosing one card gateway and one offline payment option. That gives customers a smooth way to pay online while still matching how many restaurants handle pickup and delivery.
Turn on card payments and wallet pay through the same gateway. For mobile checkout, enable Apple Pay or Google Pay. Then add offline options that fit your setup, such as Pay at pickup for pickup orders and Pay cash on delivery for delivery orders.
Taxes need to be set with care. The goal is simple: apply the right local tax to delivery orders and keep menu pricing consistent. In WooCommerce, enable taxes, set the calculation address to shipping, add your standard tax rates for the restaurant’s state and ZIP code, and confirm whether menu prices appear before or after tax.
Set order emails, status flow, and kitchen printing
Once payments are working, connect the alerts that keep the kitchen and front counter on the same page.
Send new order emails to an inbox that staff actively monitor. Customer confirmation emails should show the order summary, the selected time slot, and any order notes the customer entered. For example: "Pickup on 07/14/2026 at 6:30 PM." Use a transactional email service through WP Mail SMTP to help keep confirmations out of spam folders.
Use this status flow: New Order → Preparing → Ready for Pickup / Out for Delivery → Completed. Staff should update each status as the order moves through the kitchen. That way, customers get the right updates, and orders are less likely to slip through the cracks.
For kitchen alerts, combine a few tools:
- Email for records
- A live dashboard so the kitchen can see incoming orders
- A thermal printer for printed tickets
- Mobile push alerts for managers
After all of that is set, run a full end-to-end test before launch.
5. Test the full order flow before launch
Before you go live, run the entire ordering process from start to finish. Don’t just click around in the dashboard and assume it works. Open a private browser window and place at least one pickup order and one delivery order using your payment gateway’s sandbox or test mode, so no live charges go through. This is where small setup mistakes tend to show up.
For the pickup test, add an item with modifiers and go all the way through checkout. Check that modifier pricing is included in the line item total, sales tax matches your U.S. tax settings, and the time slot selector shows only the windows that fit your set business hours. Then try to force an invalid slot, like one during your blocked prep window or outside opening hours, and make sure checkout won’t let it pass. After you place the order, open WooCommerce → Orders and confirm the pickup time, all modifiers, and the customer’s contact details are easy for staff to read at a glance.
Next, test delivery the same way, because delivery zones and timing follow different rules. Enter one address inside your delivery area, then try another just outside it. The out-of-zone order should be blocked with a clear message. On the valid delivery order, make sure the delivery fee appears as its own line item, the total matches what you calculate by hand, and the scheduled delivery time follows your prep buffer.
After both test orders are in, move them through the status flow – New Order → Preparing → Ready for Pickup / Out for Delivery → Completed – and check that each status change sends the right notice. The customer confirmation email should include:
- Order number
- Full item list with modifiers
- Final total with taxes and fees
- Order type
- Scheduled time slot in U.S. format, such as "July 14, 2026 at 6:30 PM."
Your staff should get an internal alert right away. If a test order slips through without anyone noticing, fix the notification routing before launch.
Then do one last practical check: print a sample kitchen ticket or set up a kitchen display system (KDS) exactly how the kitchen will see it. It should show the order type, item names, every modifier, special instructions, and the due time clearly, with nothing cut off.
FAQs
How do I choose the right lead times for my kitchen?
In your FoodMaster settings, set prep times for pickup and delivery so customers know when to expect their order. You can use a fixed estimate, like 20 minutes, to show when an order should be ready.
You can also turn on automatic delivery time calculations based on each product’s processing time. Clear, steady lead times help prevent kitchen bottlenecks and give customers a more accurate pickup or delivery window.
What should I do if delivery orders fall outside my service area?
Use FoodMaster’s delivery settings to set clear service boundaries. Add a maximum delivery radius to create a hard cutoff, so customers outside your range can’t place delivery orders.
You can also set delivery zones by drawing them on a map. That gives you more control over your service area and helps block orders from addresses outside those zones.
How can I test that time slots and checkout rules work correctly?
Run live tests the same way a customer would. Turn on Test mode in WooCommerce payments and use test card numbers so you can place orders without any actual charges.
Test orders during both open and closed hours. Also check both pickup and delivery. You want to make sure the store allows or blocks ordering at the right times, and that delivery fees, zone limits, and prep lead times show up correctly at checkout.
Related Blog Posts
Commission-free ordering
Run restaurant orders on your own WordPress site
FoodMaster adds delivery, pickup, dine-in, POS, and kitchen tools — with zero per-order fees.