On this page
- Build a WooCommerce Restaurant Ordering System (Online + Point of Sale)
- 1. Install WooCommerce and FoodMaster
- Install and Activate Both Plugins
- Check Core Store Settings Before Building the Menu
- 2. Build the Food Menu in WooCommerce
- Create Menu Categories and Add Food Items
- Menu Item Fields at a Glance
- 3. Set Up Pickup, Delivery, Checkout, and Payments
- Set Pickup and Delivery Rules
- Set Up Checkout Fields and Payment Options
- 4. Manage Incoming Orders and Go Live
- Process Orders from the WordPress Admin Area
- Launch Checklist and Key Takeaways
- FAQs
- Can I use this with my existing WordPress theme?
- How do I handle toppings and add-ons?
- What should I test before going live?
- Related Blog Posts
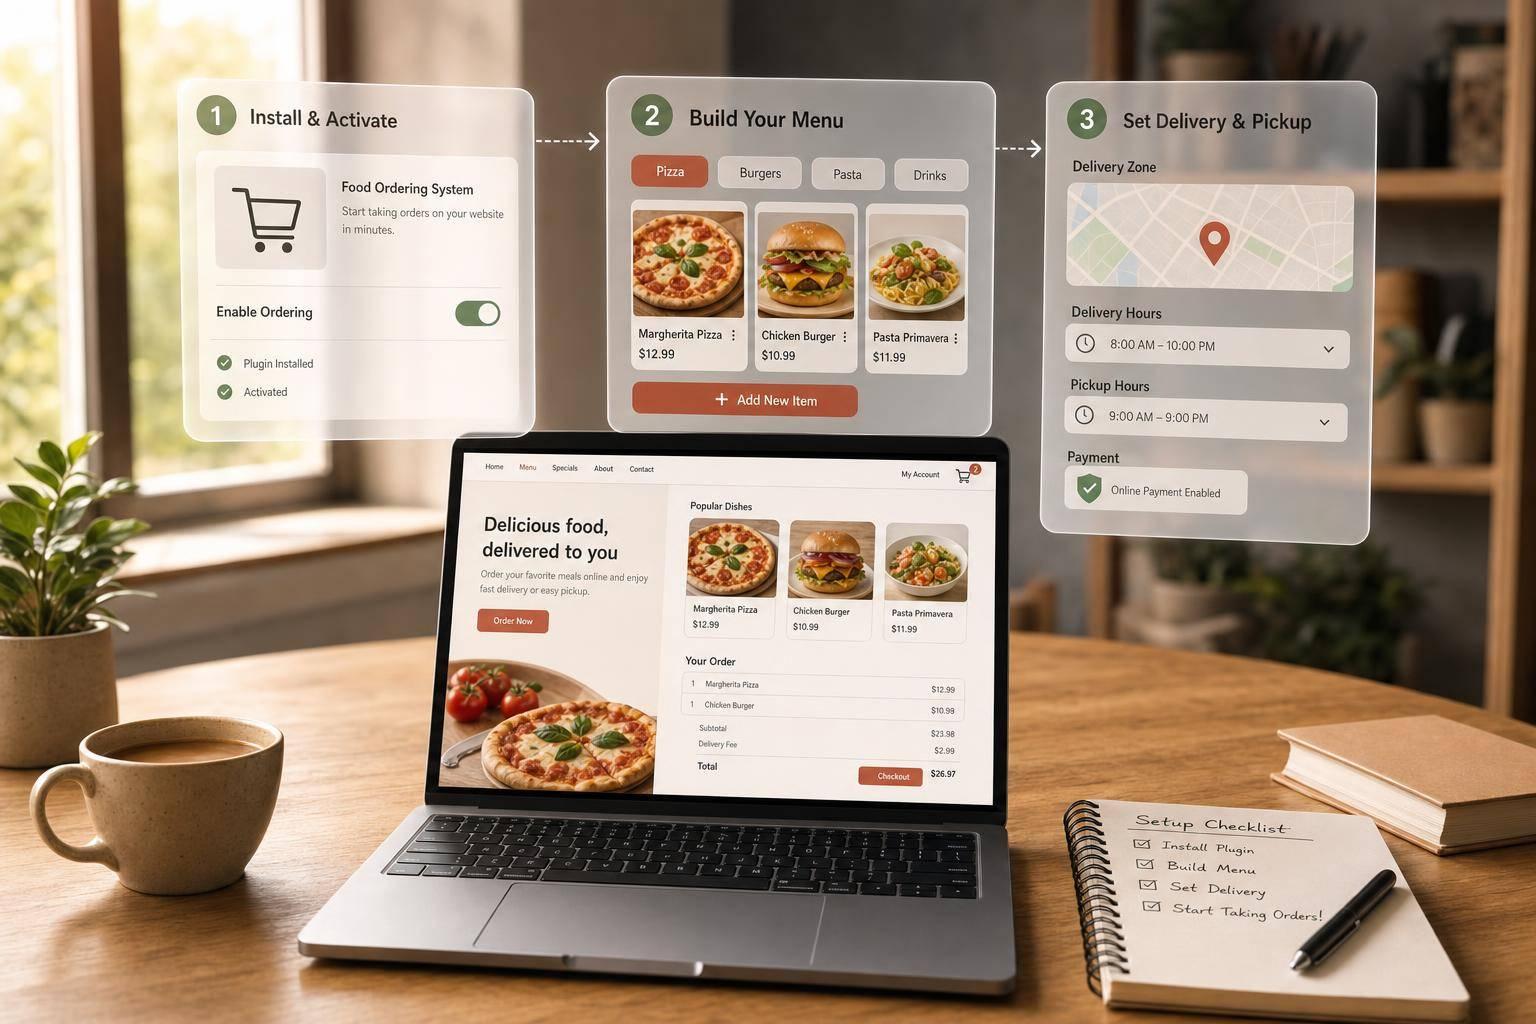
You can set up a WordPress food ordering system in 4 parts: install WooCommerce and FoodMaster, build your menu, set pickup and delivery rules, and test orders before launch. If your site uses HTTPS, runs on PHP 7.4+, and is set to USD, you can start taking online orders with pickup, delivery, Stripe, PayPal, and timed checkout slots.
Here’s the short version:
- I install WooCommerce and FoodMaster
- I set the store address, $USD, timezone, and permalinks
- I build menu categories like Pizza, Burgers, and Drinks
- I add products with names, prices, photos, and short descriptions
- I turn on Pickup, Delivery, or both
- I set hours, ZIP-code delivery areas, fees, minimums, and lead times
- I set checkout fields for pickup and delivery
- I test payments with Stripe and confirm the order email and thank-you page
- I review orders in WooCommerce → Orders or FoodMaster → Orders
A few numbers matter here. The guide recommends 6 to 8 top-level menu categories, 7 to 10 items per category, pickup lead times around 15–20 minutes, delivery lead times around 30–45 minutes, and 30-minute time slots for order-ahead service.
Bottom line: if you want customers to order food on your WordPress site, pay online, and choose a pickup or delivery time, this guide shows the full setup path in plain steps.
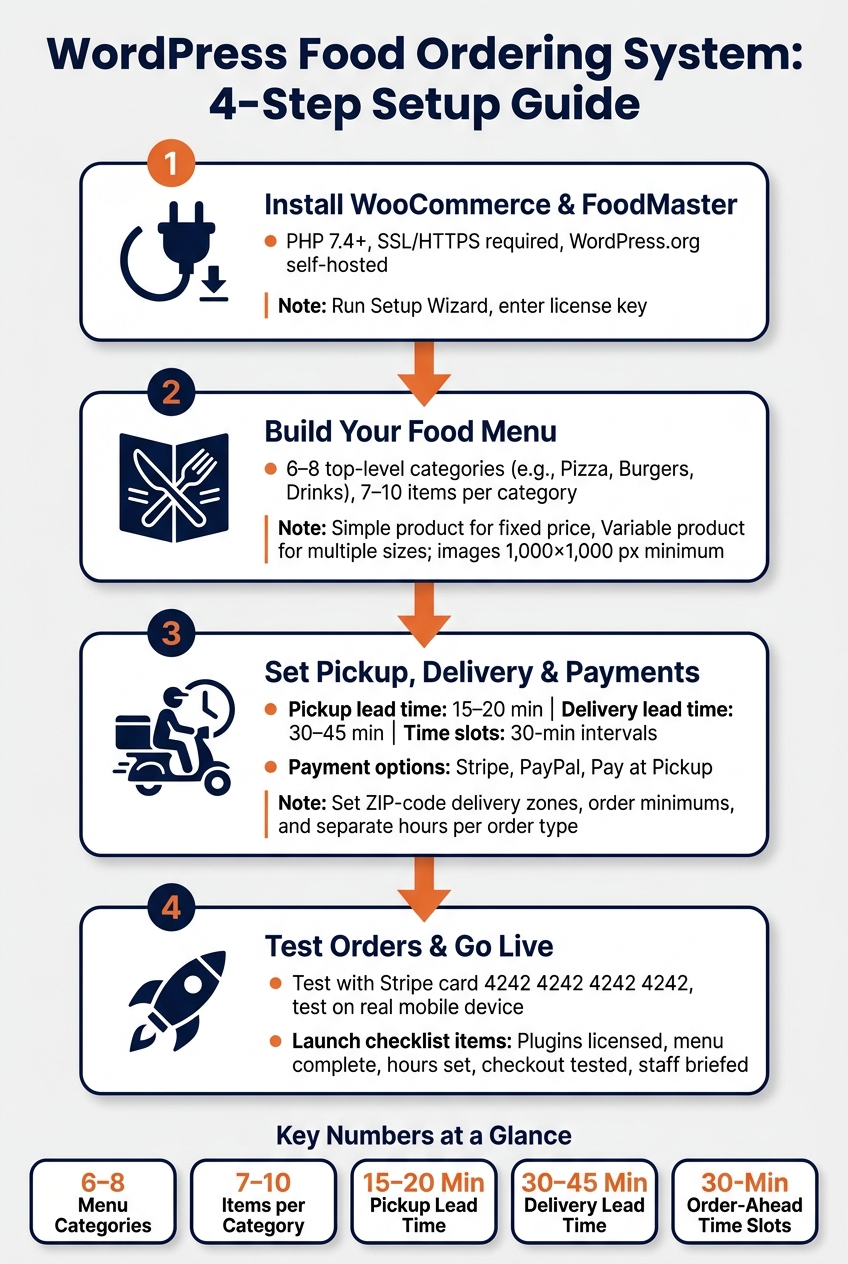
WordPress Food Ordering System: 4-Step Setup Guide
Build a WooCommerce Restaurant Ordering System (Online + Point of Sale)
1. Install WooCommerce and FoodMaster
Before you build your menu, make sure your site is ready to take orders, process payments, and handle pickup or delivery times. Your site needs to run on PHP 7.4 or higher, use an active SSL certificate (HTTPS), and be set up on a self-hosted WordPress.org install with WordPress admin access. If SSL isn’t active, payment gateways like Stripe, Square, and PayPal won’t work the way they should.
Install and Activate Both Plugins
Install WooCommerce from Plugins → Add New. Then upload the FoodMaster ZIP through Plugins → Add New → Upload Plugin. Be sure to upload the ZIP from the Main Plugin folder.
After FoodMaster is activated, you’ll see a prompt to run the Setup Wizard. Go ahead and run it. It imports demo content and lets you set your restaurant details, hours, and order types. Once that’s done, head to FoodMaster → Settings, enter the license key from your purchase confirmation email, and save it. That key is needed for updates and support.
With both plugins active and the basic store setup done, you’re ready to build the menu.
Check Core Store Settings Before Building the Menu
Open WooCommerce → Settings → General and set your restaurant address and USD currency. Use your restaurant’s physical U.S. address – street, city, state, and ZIP code. That address matters because it affects how taxes are calculated at checkout. You can also configure specific tax rules and legal disclosures to ensure your store remains compliant.
Then go to Settings → General in WordPress and set the timezone to match your restaurant’s location, such as America/Chicago or America/Los_Angeles. Also check that the date format is MM/DD/YYYY and the time format uses a 12-hour clock with AM/PM, like 6:30 PM. These settings control how order times appear to customers.
Last thing: open Settings → Permalinks and choose the Post name structure. This keeps your menu URLs clean and helps FoodMaster features work as expected.
Next, build your categories and add each food item.
2. Build the Food Menu in WooCommerce
Create Menu Categories and Add Food Items
Start with categories before you add any food items. Go to Products → Categories and set up the menu sections customers will see on the live order page. Common examples include Appetizers, Pizza, Burgers, Salads, Sides, Drinks, and Desserts.
For most restaurants, 6 to 8 top-level categories is enough. Each category should include only the items that fit there. Keep the names short, and keep the order steady so people can scan the menu faster on both desktop and mobile.
A good rule of thumb is to keep 7–10 items per category and place your top-priority items first and last.
After that, create each menu item in the right section.
Go to Products → Add New to add each food item. Use Simple product for fixed-price items, like a side salad or a fountain drink. Use Variable product when the same dish comes in more than one size, like a 10-inch and 14-inch pizza, so you can set a different price for each size. Before saving, assign the item to the proper category.
Put your top-priority sections near the top of the menu. You can use the Order field in each category to move sections like Specials or Combos higher up.
For photos, use a square JPEG that is at least 1,000×1,000 px, shot in good light on a clean background. Keep the look steady across all items so the menu feels polished and easy to scan.
Menu Item Fields at a Glance
These fields are enough to publish a customer-ready menu item. Fill out all five for every product before listing it.
| Field | What to Enter |
|---|---|
| Item Name | The dish name customers know, such as "Classic Margherita Pizza" |
| Category | The menu section it belongs to, such as Pizza, Sides, or Drinks |
| Price | Base cost in U.S. dollars, such as $14.99; set per variation if using Variable product |
| Image | Square, high-quality photo of the prepared dish, 1,000×1,000 px or larger |
| Description | main ingredients, portion notes, and key traits like "spicy" or gluten-free labels |
Use the Short Description for a one- or two-line menu blurb instead of a full paragraph. For example, write "Grilled chicken breast, lettuce, tomato, and aioli on a brioche bun." That short version appears on the menu browsing page, so it needs to read well at a glance on a phone screen.
To display it there, turn on Show Product Short Description in FoodMaster → Settings → Tweaks.
Once the core fields are filled in for each item, the menu is ready to display. Toppings, add-ons, and extras – like "Add bacon +$2.00" – can be added later with FoodMaster’s Extra Options tab, which supports checkbox multichoice, checkbox limited choice, single-choice radio, and single-choice select (dropdown).
Next, set pickup, delivery, checkout, and payment rules. You can also compare payment gateways to find the best fit for your checkout flow.
sbb-itb-7e654f7
3. Set Up Pickup, Delivery, Checkout, and Payments
With the menu in place, the next step is to decide how orders move through pickup, delivery, checkout, and payment.
Set Pickup and Delivery Rules
Go to FoodMaster → Settings → Order Types and turn on Pickup, Delivery, or both. FoodMaster also lets you set separate hours for each order type. That makes life a lot easier if, say, you want pickup to stay open later than delivery or you only want delivery during certain time windows.
A common U.S. setup looks like this: Mon–Thu 11:00 AM–9:00 PM, Fri–Sat 11:00 AM–10:30 PM, and Sun 12:00 PM–8:00 PM.
For delivery, set up WooCommerce shipping zones and use ZIP codes to control delivery fees, order minimums, and areas you don’t serve.
Lead times matter more than most people think. A good starting point is 15–20 minutes for pickup and 30–45 minutes for delivery. If you want to let customers order ahead, turn on time slots with 30-minute intervals and set a cap on how many orders can land in each slot. That helps keep the kitchen from getting slammed all at once.
Set Up Checkout Fields and Payment Options
FoodMaster adjusts checkout fields based on the order type. For pickup orders, collect the customer’s name, phone number, and email. For delivery orders, collect street address, city, state abbreviation, and ZIP code. Phone and email should be required for both.
Turn on the Notes field too. It gives customers a place to add details like "Leave at the door" or "Extra napkins." Those notes show up with the order in the WordPress admin area.
For payments, use Stripe for cards, Apple Pay, and Google Pay. Add PayPal as a backup, and include Pay at Pickup or Cash on Delivery if you want to accept in-person payment.
Before you go live, place a test order for both pickup and delivery in Stripe test mode. Use the 4242 4242 4242 4242 test card number and make sure the full flow works: payment, order confirmation page, and confirmation email.
Once checkout is working, you can start handling incoming orders from the WordPress dashboard.
4. Manage Incoming Orders and Go Live
Process Orders from the WordPress Admin Area
Now that checkout is live, new orders will start landing in your dashboard.
You can view them in WooCommerce → Orders inside WordPress. They’re also available in FoodMaster → Orders. Each order shows the customer name, ordered items, total, payment status, and fulfillment type. Check the fulfillment type first. That one detail shapes everything that happens next.
Once payment clears, orders usually move to Processing while the kitchen gets to work. After the order is handed off, mark it Completed. If you want to cut down on manual steps, you can use AutoComplete Order After Print in the desktop app.
FoodMaster’s desktop app can auto-print new orders to a thermal printer, and the KDS displays live incoming tickets. Before anyone starts making an order, staff should confirm whether it’s pickup or delivery. Then they should look at the details that matter most: pickup name and time, or delivery address and instructions, plus the customer’s phone number, item modifiers, and order notes.
Launch Checklist and Key Takeaways
Before you open the site to customers, do one final check.
| Area | What to Confirm |
|---|---|
| Plugins | WooCommerce and FoodMaster are active and licensed |
| Menu | All items, prices, and categories are complete |
| Hours | Store hours and order type schedules are set correctly |
| Pickup & Delivery | Rules, zones, lead times, and minimums are configured |
| Checkout | Fields work for both pickup and delivery order types |
| Payments | Payment gateways are live and tested |
| Mobile | Full order placed on a real phone, not a desktop resize |
| Staff | Team knows how to find, review, and update incoming orders |
Place one full test order on a real phone. Browse the menu, add items, choose pickup or delivery, finish checkout, and make sure the order screen appears. This step sounds simple, but it catches the stuff people miss on desktop. Look closely at button sizes, the time slot selector in 12-hour AM/PM format, and whether prices are easy to read in $.
It also helps to give each person a clear job from the start:
- One person watches incoming orders
- One person updates order statuses
- One person answers customer questions
That way, when the first rush hits, no one’s standing around wondering who’s supposed to do what.
FAQs
Can I use this with my existing WordPress theme?
Yes. FoodMaster works with your current WordPress theme, so you can upload and activate the plugin right from your WordPress dashboard and start using it.
The FoodMaster theme is optional. If you stick with your current theme, check that your menu page looks good on mobile. FoodMaster’s responsive templates are made to fit into your site’s existing layout.
How do I handle toppings and add-ons?
In FoodMaster, start by creating Extra Option Categories. This is where you set up groups like sauces or toppings, choose the selection type, and decide whether they appear in an accordion or flat layout.
Then add the individual options inside each category. Set the price for each item, choose whether it should be pre-checked, and link those categories to the right menu products or variations in the WordPress product editor.
What should I test before going live?
Before you go live, test your payment processing in Test mode. Run a few test transactions to make sure your API keys are working and to catch setup issues before customers do.
Then double-check the basics that can trip people up fast:
- Operating hours
- Delivery zones
- Minimum order amounts
- Lead times
Last, place a test order on a mobile device. Make sure the menu loads well, images look right, and the add-to-cart flow feels smooth from start to finish.
Related Blog Posts
Commission-free ordering
Run restaurant orders on your own WordPress site
FoodMaster adds delivery, pickup, dine-in, POS, and kitchen tools — with zero per-order fees.