On this page
- Prepare WooCommerce Before Adding Business Hours
- Check the WordPress Time Zone and Local Store Settings
- Confirm Menu, Checkout, and Service Method Setup
- Set Daily Opening Hours and Closed Periods
- Add Opening and Closing Times for Each Day
- Use Split Shifts for Lunch and Dinner Service
- Show Clear Open and Closed Messages to Customers
- Manage Holidays, Special Hours, and Preorders
- Block Holidays and Set One-Day Schedule Changes
- Allow Preorders Only for Valid Future Service Times
- Connect Hours with Ordering Plugins and Wrap Up
- How Hours Affect Pickup, Delivery, and Checkout Behavior
- Using FoodMaster for Restaurant Hours and Scheduled Ordering
- Conclusion: Key Settings That Stop Off-Hours Orders
- FAQs
- Why is the WordPress time zone so important?
- Can I set different hours for pickup and delivery?
- How do I stop preorders on holidays?
- Related Blog Posts
If I set restaurant hours the right way, WooCommerce stops taking orders when my kitchen is closed. That means fewer refund requests, fewer missed tickets, and fewer customers trying to order at 3:00 AM.
Here’s the short version:
- I set my WordPress time zone first, using a city-based U.S. setting like
America/New_York - I check date and time formats so customers see times like 11:30 AM and dates like 07/16/2026
- I add daily opening and closing hours for each day of the week
- I use split shifts if I serve lunch and dinner in separate windows
- I add holiday closures and one-day special hours for dates like Thanksgiving or July 4
- I limit preorders to valid future time slots only
- I make sure my ordering plugin applies those rules in the menu, cart, time picker, and checkout
- I show a clear closed message with the next time customers can order
A few numbers matter here too:
- New WordPress installs often start on UTC, which can throw store hours off right away
- Many restaurants use 30–90 minutes of lead time for same-day orders
- Large orders may need 12–24 hours
- A next-day cutoff like 10:00 PM can give the kitchen time to plan
The main point is simple: hours only work if the schedule, time zone, service methods, and checkout rules all match. If one part is off, orders can still slip through when the store is closed.
Below, I’ll walk through the setup in a simple order so you can block off-hours orders and keep only valid pickup and delivery times available.
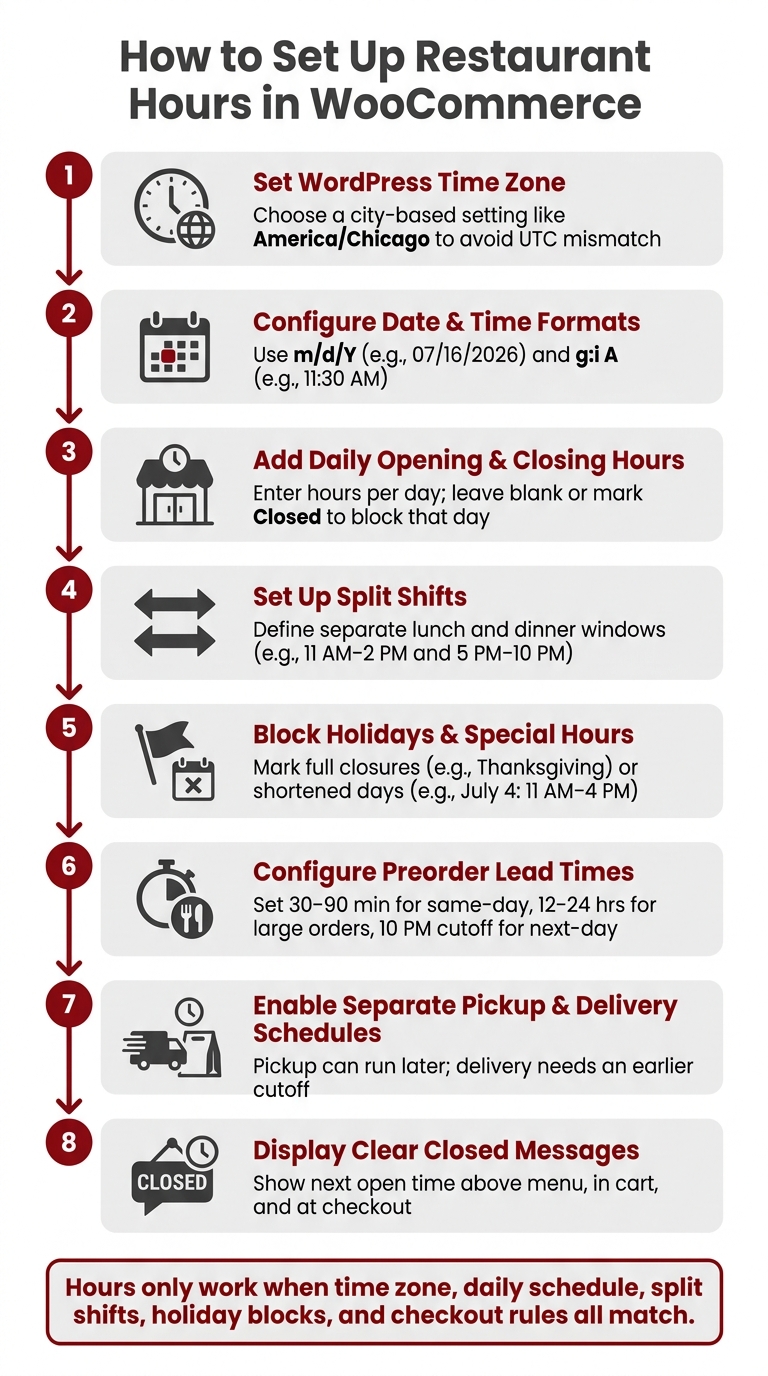
How to Set Up Restaurant Hours in WooCommerce: 8-Step Checklist
Prepare WooCommerce Before Adding Business Hours
Before you add business hours, make sure WooCommerce and WordPress are using the right local settings. If the time zone is off or the ordering setup is only half-done, orders can slip through at the wrong time. And that can turn into a mess fast.
Check the WordPress Time Zone and Local Store Settings
Head to Settings → General in your WordPress admin and check the Timezone field. New WordPress installs default to UTC, which means your store clock won’t line up with your restaurant’s actual hours until you change it. Set the time zone to a city-based option like America/Chicago so daylight saving time updates on its own.
On that same screen, set your Date Format to m/d/Y, like 07/16/2026, and your Time Format to g:i A, like 11:30 AM. That keeps your dates and times in a format most U.S. customers expect to see.
Next, go to WooCommerce → Settings → General and enter the store address so it matches the restaurant’s location. This helps keep pickup and delivery settings lined up with the right local schedule.
Confirm Menu, Checkout, and Service Method Setup
Get the menu in place first. After that, check that pickup and delivery are turned on before you start adding hour rules.
You should also make sure both service methods are enabled and tested in WooCommerce or your ordering plugin before any time-based rule starts controlling them.
Then run through the full ordering flow, from menu to order confirmation, and make sure payment works without issues. Once that setup is clean, you’re ready to add opening hours and closed periods.
sbb-itb-7e654f7
Set Daily Opening Hours and Closed Periods
Once your time zone and service methods are set, the next step is simple: define the daily hours that control when customers can check out.
Add Opening and Closing Times for Each Day
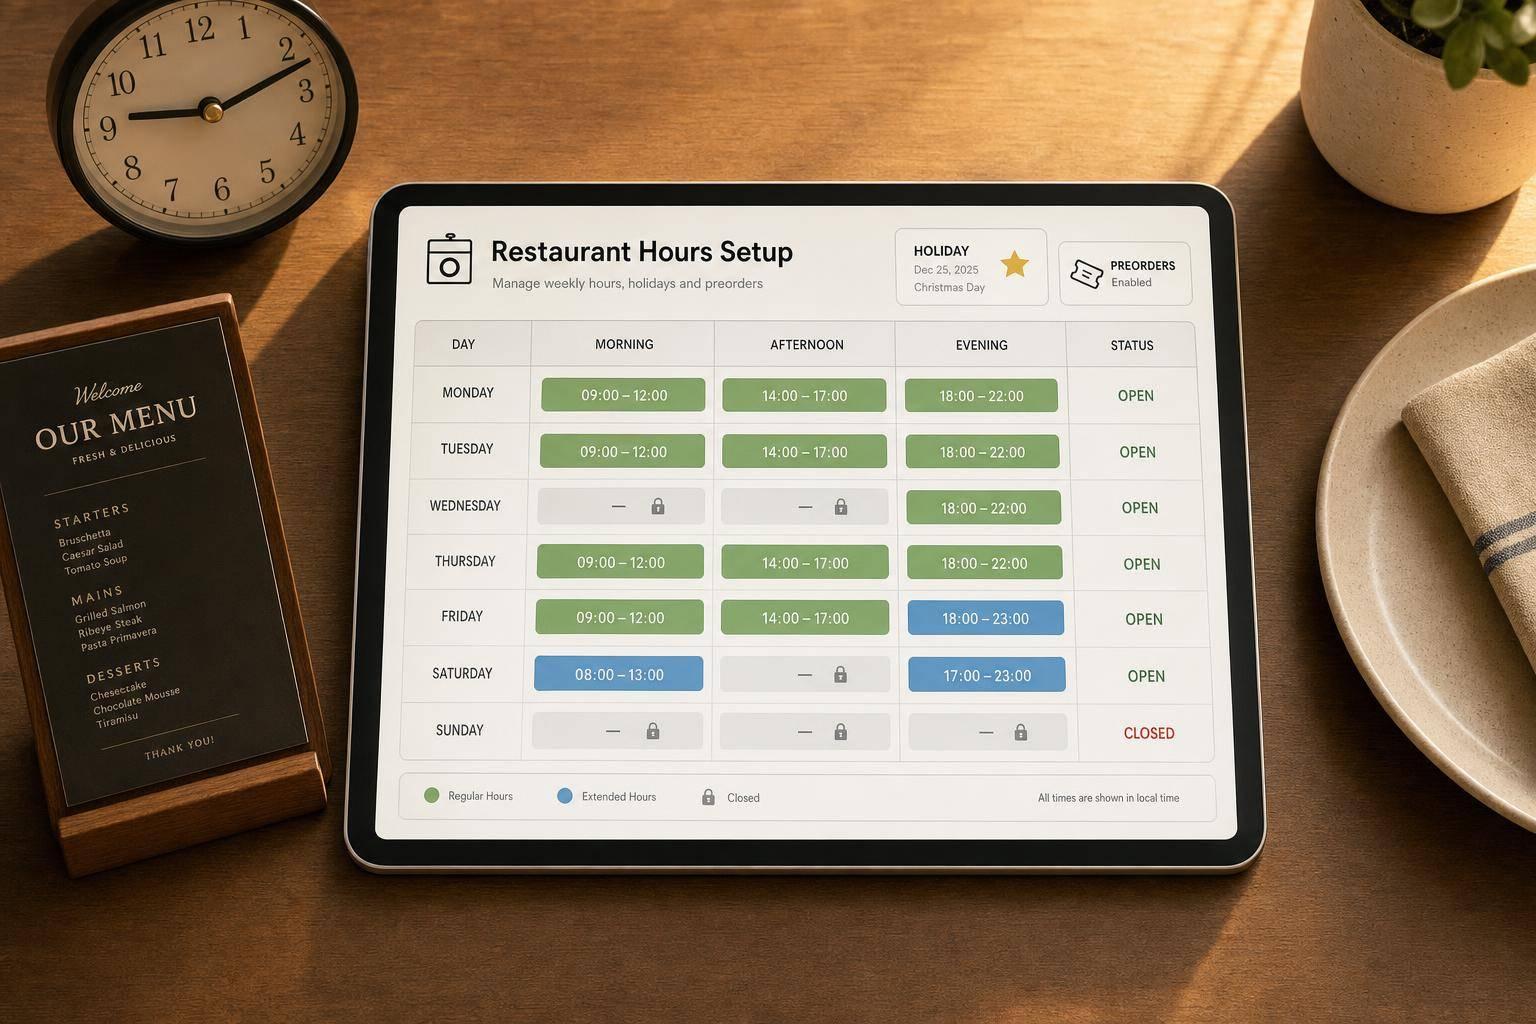
Open the plugin’s Store Hours screen and enter hours for each day. Use the 12-hour clock with AM/PM. A common setup is Monday through Friday, 11:00 AM to 10:00 PM, and Saturday through Sunday, 10:00 AM to 11:00 PM. If a day is left blank or marked Closed, ordering stays off for that entire day.
When the closing time hits, the store moves to closed status, turns off ordering, and shows your closed notice. In practice, it’s smart to set the online cutoff a few minutes before the kitchen stops taking tickets.
Use Split Shifts for Lunch and Dinner Service
Split shifts are handy if you run lunch and dinner as two separate order windows. For more granular control, you can also set up time slot-based ordering to manage peak capacity. You can set one window for lunch and another for dinner on the same day.
That gap matters. If someone visits between those time blocks, the store shows as closed until the next shift starts. The schedule handles that break on its own, so you don’t need to manage it by hand.
Show Clear Open and Closed Messages to Customers
Your closed message should tell people when they can order next. If your plugin allows dynamic placeholders, use them. Variables like {next_open_time} or {next_open_day} pull the next open slot from your schedule automatically, which keeps the message correct without extra edits.
Here are a few clear U.S. English examples:
- Closed mid-day: "Online ordering is closed right now. We’ll reopen today at 5:00 PM."
- Closed for the night: "We’re not taking orders right now. Our next ordering hours start tomorrow at 11:00 AM."
- Closed all day: "We’re closed today. Come back Tuesday at 11:00 AM to place your order."
Place that notice where customers will actually see it:
- Above the menu
- In the cart
- At checkout
No one should get all the way to the "Place Order" button and only then learn the restaurant is closed.
After your daily hours are set, add holiday closures and preorder rules for special dates.
Manage Holidays, Special Hours, and Preorders
Your weekly schedule covers the normal flow of service. But holidays and one-off events need their own rules. If you skip that step, customers can place orders for a day when the kitchen is closed or miss a shorter service window.
Block Holidays and Set One-Day Schedule Changes
Once your weekly hours are in place, set delivery hours management rules for dates that don’t follow the usual schedule. For a full closure like Thanksgiving Day, mark that date as closed all day, turn off every pickup and delivery slot, and block checkout for that date. For a shorter day like July 4, add a special-hours rule for that date only. That way, your usual schedule stays the same on every other day.
Here’s how each type of exception changes what customers can book and see:
| Schedule type | Order availability | Delivery/pickup slots | Customer message |
|---|---|---|---|
| Holiday closure | Orders blocked for that date | Date unavailable | "We’re closed all day on Thursday, November 26, 2026, for Thanksgiving. Please choose another date for pickup or delivery." |
| Special-hours day | Orders only within the shortened window, such as 11:00 AM–4:00 PM | Slots limited to the special window only | "Special July 4 hours: online orders are available from 11:00 AM to 4:00 PM. No evening service on this date." |
Place the exception notice right next to the blocked date or the shortened hours. That small bit of context can save a lot of confusion at checkout.
Allow Preorders Only for Valid Future Service Times
After exception dates are blocked, keep preorders limited to future time slots that still work. In plain English: customers should only be able to preorder within open service windows, while holiday closures and special-hours overrides are filtered out on their own.
Many U.S. restaurants set a minimum lead time of 30–90 minutes for same-day orders. Bigger orders or catering often need 12–24 hours. A daily cutoff, like 10:00 PM for next-day orders, gives the kitchen time to prep. It also helps to set lead times by service type, since delivery usually needs more time than pickup.
Connect Hours with Ordering Plugins and Wrap Up
How Hours Affect Pickup, Delivery, and Checkout Behavior
Hours only matter if the ordering plugin enforces them in the menu, time-slot picker, and checkout. Setting hours and scheduled ordering on a schedule screen alone isn’t enough. The plugin has to apply those rules where customers actually place orders.
Pickup and delivery also need separate schedules. Pickup can often run later, while delivery usually needs an earlier cutoff. And if your rush periods get hectic, slot limits can save you a lot of trouble. Capping orders per time slot helps prevent overload, so it’s worth setting up once your hours are live.
Using FoodMaster for Restaurant Hours and Scheduled Ordering
Once your schedule is set, the plugin needs to carry those rules across the ordering flow and checkout. FoodMaster – Restaurant Ordering Plugin uses its own hours system instead of WooCommerce’s default shop settings, which means you can set different schedules for delivery and pickup. Holiday overrides, split shifts, lead times, and daily cutoffs all shape which times customers can choose.
Here’s how FoodMaster handles ordering times:
| Feature | How it follows opening hours | How it handles holiday closures | How it supports preorder rules |
|---|---|---|---|
| Ordering forms | Shows valid service times; displays closed message when unavailable | Uses Special Dates to override the weekly schedule | Lets customers pick future dates within open windows |
| Pickup scheduling | Shows pickup slots during configured kitchen hours | Hides pickup slots on blocked dates | Enforces minimum lead times before the first available slot |
| Delivery scheduling | Runs a separate cutoff from pickup; may end before kitchen close | Removes delivery slots on holiday closures | Limits advance booking to valid delivery windows |
| Order capacity | Caps orders per slot during open hours | Blocks orders on closed dates | Prevents overbooking on future dates |
That’s the direct result of setting hours the right way: valid slots stay visible, and closed times stay blocked.
Conclusion: Key Settings That Stop Off-Hours Orders
Match the time zone, daily hours, split shifts, holiday blocks, and preorder rules so checkout shows only valid service times.
FAQs
Why is the WordPress time zone so important?
The WordPress time zone matters because it controls your store’s operating hours. If it’s wrong, your store can show the wrong status, take orders when your kitchen is closed, or stop orders during normal business hours.
When the time zone is set correctly, your opening hours, holiday schedules, and scheduled pre-orders line up with your actual local hours.
Can I set different hours for pickup and delivery?
Yes. In FoodMaster, you can set separate hours for pickup, delivery, and dine-in.
Each order type has its own schedule. That includes opening times, day-of-week hours, and holiday dates. So, for example, pickup can start at 10:00 AM, while delivery begins at 11:30 AM.
How do I stop preorders on holidays?
In FoodMaster, go to Delivery Hours and choose Special Dates. Add the holiday date, then set it to Closed all day. That stops new orders from being placed for that date.
If you’re staying open but want to stop holiday preorders, set a daily cutoff time. That way, customers can’t schedule orders after the deadline.
Related Blog Posts
Commission-free ordering
Run restaurant orders on your own WordPress site
FoodMaster adds delivery, pickup, dine-in, POS, and kitchen tools — with zero per-order fees.