A customer reports a missing meal, your shift manager opens the order, and someone clicks “Refund manually” expecting the card payment to reverse. WooCommerce now shows a refund—but the customer still hasn’t received any money.
That’s the trap: recording a refund and returning a payment aren’t always the same action. This guide covers full refunds, partial adjustments, cash and POS returns, and failed requests, with the checks that keep a small service problem from becoming a second payment problem.
How WooCommerce Refunds Work Before You Click Anything
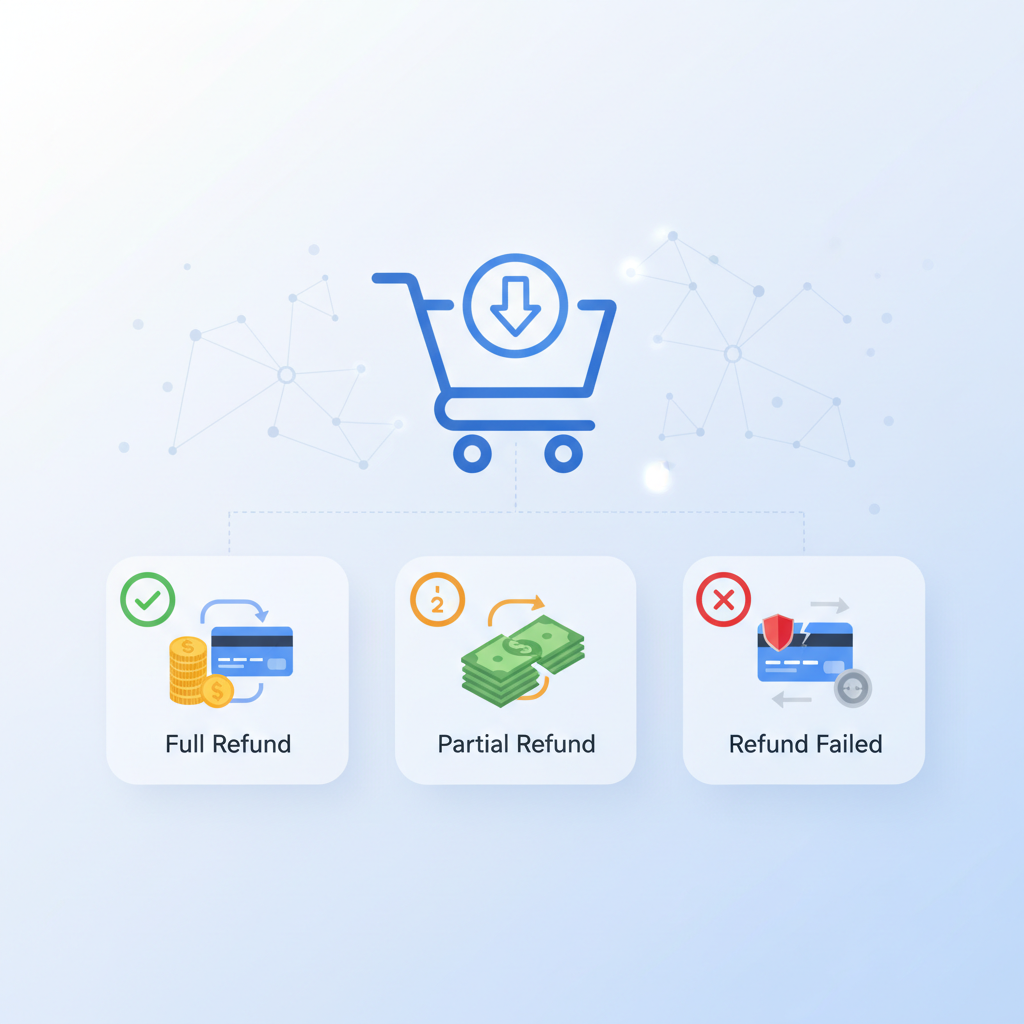
A full refund returns the entire amount paid. A partial refund returns less: perhaps the price of a missing dish, a delivery charge, or an agreed adjustment for a disappointing order. If you’ve already issued a partial refund, check the remaining refundable amount before returning anything else.
WooCommerce supports two basic refund workflows. With a compatible payment gateway extension, you can request the refund from the order screen, and the extension sends that request to the payment provider. Availability depends on the installed extension, its configuration, and the original payment method—not simply whether the store accepts online payments.
A manually recorded refund does something different. It adds a refund to the WooCommerce order without instructing a bank, card provider, or POS to return funds. You must arrange the actual payment return separately.
Changing an order’s status to “Refunded” does not itself return money. Treat the status as a record of the order’s state, not proof that a financial transaction occurred. Likewise, canceling an order isn’t a reliable way to reverse a captured payment.
Before proceeding, distinguish these three situations:
- Unpaid order: There may be nothing to refund. Confirm no payment completed before canceling it.
- Authorized but uncaptured payment: The provider may support voiding or canceling the authorization instead of issuing a refund. A temporary bank hold can take time to disappear.
- Captured payment: Money has been collected, so returning it normally requires a refund through the provider or a separately arranged repayment.
Gateway behavior varies, particularly for delayed payment methods and authorization-only transactions. If the WooCommerce status and payment dashboard disagree, investigate first. The provider’s transaction record is the place to confirm whether money was captured.
How to Issue a Full Refund in WooCommerce
The standard starting point is WooCommerce → Orders in WordPress. Open the individual order rather than changing its status from the orders list. Interface wording can vary with your WooCommerce version, gateway extension, and admin language.
1. Check the payment and previous activity
Confirm the customer, order total, currency, payment method, and transaction reference. Read the order notes for earlier refunds, failed payment attempts, or changes made by another employee. Then check the payment provider if anything is unclear.
For a complete refund, the amount you return should match what remains refundable—not automatically the original total. An order that has already received a delivery-fee refund needs a smaller final refund.
2. Open the refund controls
In the order items panel, select Refund. Enter the quantities being refunded against the relevant product lines. Review the resulting line totals and taxes rather than assuming the calculation matches your intention.
Include any applicable shipping, delivery fees, and other charges that should be returned. Depending on how your extensions store those charges, they may appear as shipping lines, fee lines, or separate items. Check each one, including any tip.
For discounted orders, refund the amount actually charged for each item. A menu item’s current price is not the basis for refunding an older, discounted purchase.
3. Make a deliberate stock decision
WooCommerce’s refund interface can offer a Restock refunded items option when applicable. This adjusts inventory for the refunded quantities; it doesn’t mean the goods have physically returned.
Leave it unchecked for prepared food that can’t be sold again. For a canceled order that never entered production, restoring sellable availability may make sense—but check how your restaurant tracks stock and whether another integration already adjusted it.
4. Submit through the payment gateway
Add a clear reason, such as “Customer canceled before preparation; full payment returned.” Reasons may appear in customer-facing refund communications, so keep internal criticism and sensitive details out.
Review the refund amount, then select the gateway-specific refund button, typically labeled along the lines of Refund [amount] via [gateway]. Don’t choose the manual option if you expect WooCommerce to send the payment request.
After submission, check the refund entry and order notes. A full refund normally changes the order status to Refunded. WooCommerce can also send a customer refund email when the relevant notification is enabled, but an email is not proof of bank settlement.
Finally, open the original payment in the provider’s dashboard. Confirm the refund amount, status, and reference. Tell the customer what was returned and explain that their payment provider or bank controls when it becomes visible.
[IMAGE: Annotated WooCommerce order refund panel highlighting item quantities, tax fields, shipping refund, restock checkbox, refund reason, and separate gateway and manual refund buttons]
How to Give a Partial Refund for a Missing Item or Delivery Problem
Partial refunds are usually the sensible response when most of an order was fulfilled correctly. A missing side dish shouldn’t require reversing a family’s entire dinner payment.
Consider this illustrative restaurant order, using tax-exclusive prices and an assumed 10% tax rate for simple arithmetic—not as tax advice:
- Two pasta dishes at $18 each: $36, plus $3.60 tax.
- One salad: $8, plus $0.80 tax.
- Delivery: $5, plus $0.50 tax.
- Total paid: $53.90.
The salad never arrived. Refunding that item means returning $8.80, leaving $45.10 paid against the order. If you also decide to waive delivery, return another $5.50, making the combined refund $14.30 and the remaining paid amount $39.60.
Refund the missing item, not just a round number
Open the order, select Refund, and enter a refund quantity of one on the salad line. Check that the line amount is $8 and the associated tax is $0.80. Leave the pasta quantities unchanged.
If delivery is being refunded too, enter the appropriate amount on the delivery line and verify its tax. Real orders may use different tax rates, tax-inclusive pricing, or exemptions, so work from the saved order values rather than applying the example’s rate.
Quantity-based refunds create a clearer relationship between the adjustment and the missing product. They also supply the item quantities used by stock-restoration controls.
An amount-only adjustment is different. You might agree to return $5 for a late delivery while the customer keeps every item. That doesn’t represent a returned product quantity, and entering only a refund total doesn’t explain how that adjustment should be allocated across products, fees, or taxes.
For accurate records, use the relevant order lines where possible and follow your accounting policy for goodwill adjustments. Don’t casually subtract tax from an arbitrary refund amount and assume it’s correct.
Keep fulfillment and stock separate
A partial refund generally leaves the order’s existing status unchanged. A Completed order can remain Completed after a missing-item refund because the remainder was fulfilled. The refund entry and notes explain the exception.
Prepared food should not automatically return to available stock. If the salad was made but left behind, it may already have consumed ingredients even though the customer never received it. And restoring one WooCommerce product unit does not necessarily restore the correct ingredients in a connected inventory system.
For restaurants using FoodMaster’s WooCommerce restaurant ordering system, the same distinction applies across delivery, pickup, and dine-in orders. Its POS, kitchen display, QR table ordering, and printing features support service workflows, but you should verify how your configured setup communicates refunds to staff. Don’t assume a financial adjustment automatically tells the kitchen to stop cooking.
Finish with a precise customer message: “We’ve refunded $8.80 for the missing salad, including its tax.” Specific beats “We’ve adjusted your order”—especially when the customer is hungry.
How to Record Manual Refunds and Handle Cash or POS Payments
The manual refund button is useful, but its label deserves respect. It records the adjustment in WooCommerce; it does not move money. Use it when the repayment happens elsewhere or the original payment method doesn’t support refunds from the order screen.
Common examples include returning cash at the counter, sending a bank transfer, refunding directly in the payment provider’s dashboard, or processing a return through a connected POS.
Use one controlled workflow
- Confirm the original payment was received and identify its transaction reference.
- Check WooCommerce, the gateway, and the POS for an existing refund or pending request.
- Process the repayment through the appropriate cash, banking, provider, or POS workflow.
- Check whether the integration automatically creates the corresponding WooCommerce refund.
- If no synchronized refund exists or is expected, record the matching amount using the manual refund option.
That synchronization check prevents a common reconciliation mess: an employee records a manual refund, then an integration imports the same refund later. A duplicate record can make the order look over-refunded even when only one repayment occurred.
Add a private order note with the amount, repayment method, date, staff identifier, and external reference where available. For cash, reference your till or cash-return record. Never paste full card numbers, bank credentials, or payment secrets into order notes.
Check tips separately
Tips aren’t necessarily stored like products. A tipping extension may represent them as fees, item lines, or metadata, and that affects what appears in the refund panel and how reporting handles the return.
If you use Tipping – Add Order Tip for WooCommerce for checkout gratuities, inspect a test order to establish how your installed version records the tip and how refunds appear in your reports. Don’t assume refunding the food automatically refunds the gratuity.
A missing dish doesn’t automatically mean the customer wants a delivery driver’s tip returned. Follow the customer agreement, your refund policy, and applicable rules. If a refunded tip has already entered a staff payout calculation, reconcile that adjustment through your payroll or accounting process rather than treating it as an ordinary product return.
[IMAGE: Refund reconciliation worksheet showing a cash return, an externally processed card refund, and a POS refund matched to WooCommerce order numbers, amounts, transaction references, and tip adjustments without customer payment details]
WooCommerce Refund Failed or Not Received? What to Check
“Refund failed” and “refund hasn’t appeared” describe different problems. One may mean no refund was created. The other may mean the provider accepted it and the customer’s bank hasn’t finished processing it.
Before retrying, inspect the original payment and its refund history in the provider dashboard. A timeout can leave WooCommerce without a clear response even though the provider created the refund. Clicking again without checking risks a second adjustment.
Start with this troubleshooting checklist
- Unsupported refund method: Does the installed gateway extension support dashboard refunds for this specific payment method? A provider may support refunds externally without exposing that capability through the extension.
- Connection or authentication errors: Check for expired or incorrect credentials, disconnected accounts, missing permissions, and live-versus-test configuration mistakes.
- Remaining refundable amount: Include previous partial refunds and refunds issued outside WooCommerce. The amount still available at the provider may differ from the local order record.
- Funding requirements: Some providers require an available balance or another funding source. Depending on provider rules, insufficient funds may delay or prevent the refund.
- Provider restrictions: Check refund time limits, transaction state, account restrictions, and rules affecting disputed or unusual payment types.
- Order notes and logs: Look for the actual error message, transaction reference, and timestamp rather than relying on a generic failure notice.
Gateway logs are commonly available under WooCommerce → Status → Logs when the extension uses WooCommerce logging. Some extensions have separate diagnostics, and detailed logging may need enabling before a controlled reproduction. Limit access and redact sensitive information before sharing excerpts with support.
Separate request status from customer receipt
If the provider shows no refund and records a definite rejection, resolve the reported issue before submitting another request. If the outcome is unclear, contact provider support with the original transaction reference, requested amount, and timestamp.
When the provider shows a pending refund, follow its stated process rather than treating “pending” as “failed.” If it shows a successful refund, give the customer the amount, processing date, and a suitable refund reference. For eligible card refunds, the provider may also supply an acquirer reference number that helps the bank trace the return.
Don’t promise that every refund arrives within a fixed number of days. Timing depends on the payment method, provider, bank, and transaction circumstances. Original processing fees and additional refund fees are also provider-specific; the amount returned to the customer and the merchant’s net cost are separate questions.
If money was successfully refunded but WooCommerce still shows the old state, investigate synchronization, including webhook delivery where applicable. Repair the record without sending another payment refund. One confirmed money movement should have one matching accounting record—not a trail of hopeful retries.
Test Your Refund Workflow and Create a Staff Checklist
A refund process belongs in launch testing, not just in the manager’s memory. Use a staging site and the gateway’s sandbox or test mode where supported. Confirm that staging cannot send live payment requests, customer emails, kitchen tickets, or POS inventory changes.
Never assume a copied production site is harmless. It may retain live credentials and integration endpoints until someone deliberately isolates them.
Run three practical tests
First, complete a test payment and issue a full gateway refund. Check product totals, tax, shipping, any tip, the resulting order status, the notification, and the provider’s test transaction record.
Next, refund one item from a multi-item order. Verify the remaining paid amount, the item’s tax, the unchanged fulfillment status, and what happens when restocking is disabled.
Finally, record a manual refund on a suitable test order. Confirm that WooCommerce records the adjustment without creating a gateway refund. Where a POS or external refund synchronization is involved, test that path separately. Sandbox behavior cannot establish real bank processing times, but it can expose workflow mistakes.
Give staff a short pre-refund checklist
- Confirm the employee has authorized refund permissions; don’t grant broad administrator access just for this task.
- Verify payment capture, previous refunds, and the remaining refundable amount.
- Agree on the customer remedy and check products, discounts, delivery, tax, and tips.
- Decide whether stock should be restored and notify the kitchen separately if necessary.
- Choose gateway repayment or manual recording deliberately, then verify the result before retrying.
- Send clear customer communication and reconcile the WooCommerce entry with the gateway, cash, bank, or POS record.
Keep the checklist near the people handling complaints, and review it after gateway or POS changes. The goal is straightforward: return the right amount once, keep inventory honest, and leave records the next shift can understand without asking the customer to explain everything again.
Commission-free ordering
Run restaurant orders on your own WordPress site
FoodMaster adds delivery, pickup, dine-in, POS, and kitchen tools — with zero per-order fees.